
Documentation
Tutorial — ZigBase
Build a backend end to end through the embedded admin UI or the terminal: collections, rules, auth, files, OAuth2, a route, and a cron job.
This walkthrough takes you from an empty database to a working backend for “Airbnb for golf simulators” — hosts list simulators, guests book slots. It ties together every moving part: provisioning collections, setting access rules, registering and logging in a user, creating a record with a file upload, a custom business route, and a scheduled job.
Every step that talks to the server can be done two ways — from the embedded admin UI at /_/ or from the terminal with curl — and the tab switcher on any step flips the whole page at once, so pick your path and the tutorial follows you.
Read it top to bottom and run it as you go. Each step links onward to the reference docs:
- field types & option shapes → Fields
- the full curl recipes this tutorial condenses → Recipes
- endpoint envelopes, rule semantics, realtime, files → API
- hooks, custom routes, jobs (the Zig framework) → Framework
0. Run the server
Build the binary and create a superuser (collection management is superuser-only), then start serving:
mise install                                     # Zig 0.16.0, pinned in mise.toml
zig build                                         # -> zig-out/bin/zigbase
./zig-out/bin/zigbase superuser create --email admin@example.com --password "a-strong-password" --data-dir ./zb_data
# --insecure-cookies: this tutorial runs over plain HTTP, and auth cookies are Secure by default.
./zig-out/bin/zigbase serve --insecure-cookies --data-dir ./zb_data
The server listens on http://127.0.0.1:8090 (loopback by default; a random JWT secret is generated and persisted at zb_data/.jwt_secret on first run). Sanity check:
curl http://127.0.0.1:8090/api/health # {"status":"ok"}
Throughout, BASE=http://127.0.0.1:8090.
Open the admin UI
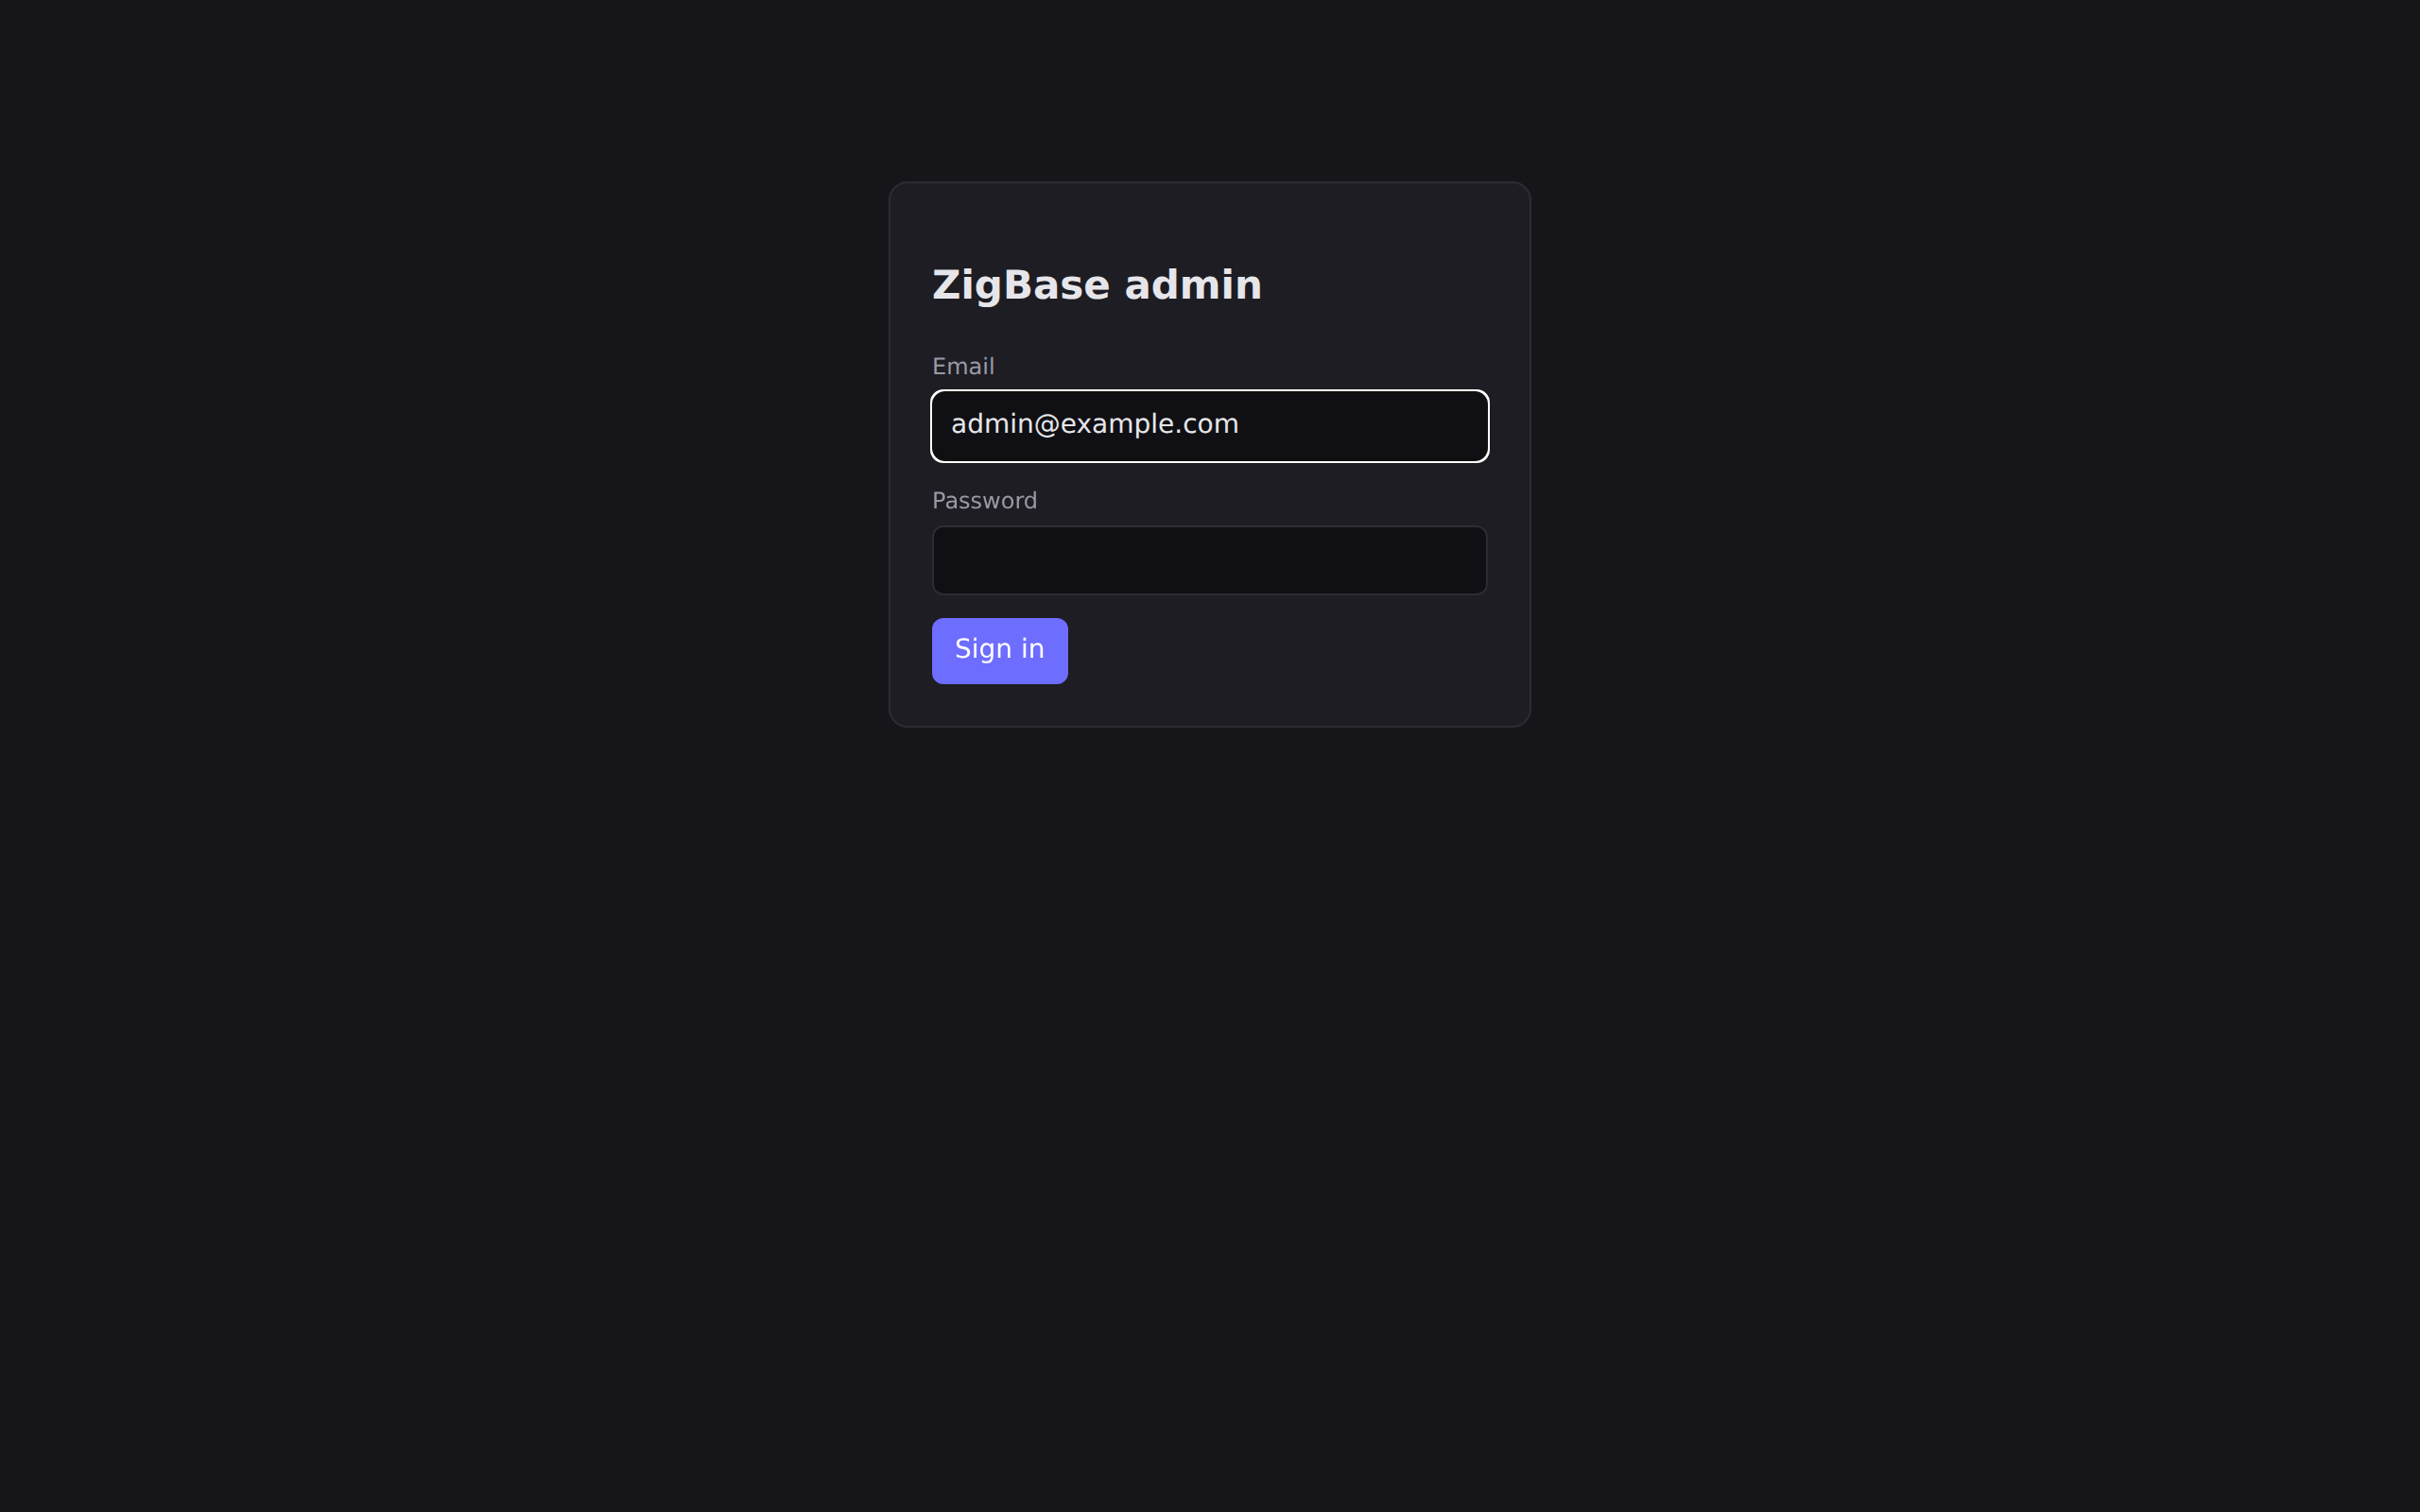
The same binary embeds an admin SPA at http://127.0.0.1:8090/_/. Open it and sign in with the superuser you just created — every admin-UI step below starts from here.
1. Provision collections (in dependency order)
The schema is three collections — users (auth), simulators, and listings — created in that order, because relation fields point at collections that must already exist.
Admin UI path
In the admin UI’s left sidebar, click ⚙ Collections, then + New collection to open the schema editor. Create the three collections in order:
users— set the name tousersand the type to auth. Click + Add field and add one extra field:name, type text. (Auth collections getemail,verified, and the password machinery for free.)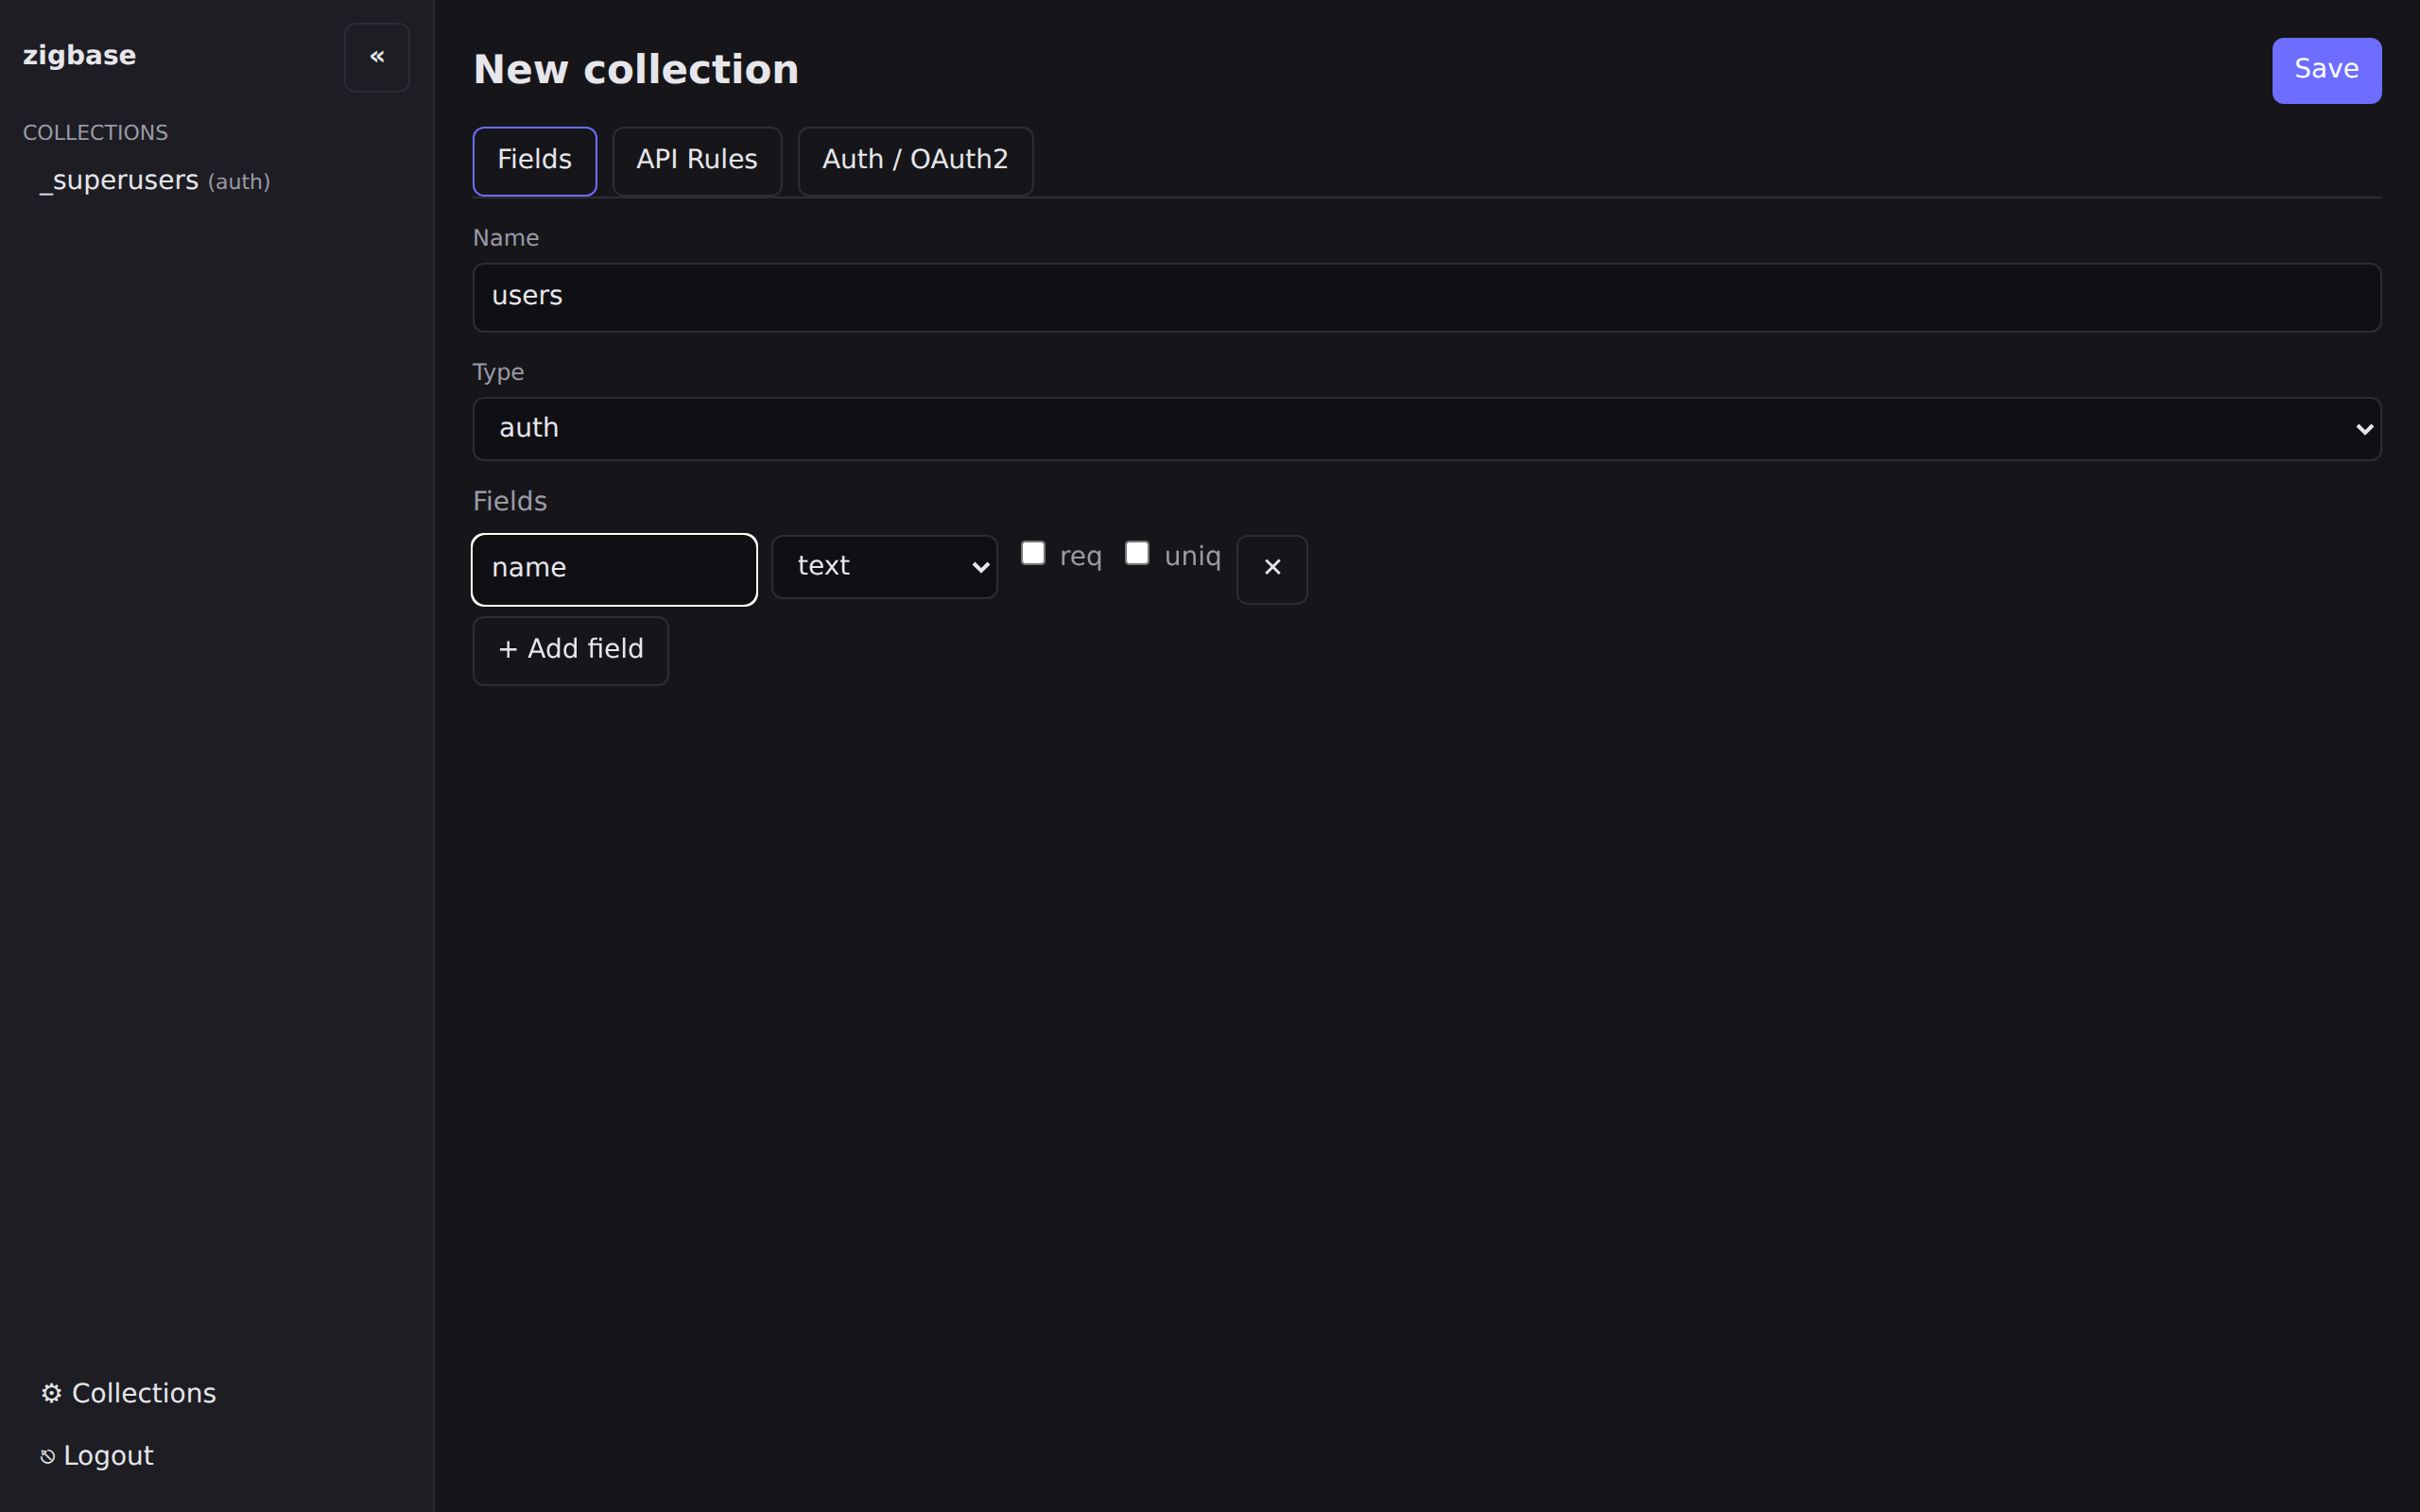
The schema editor creating the users auth collection with a name text field Before saving, switch to the API Rules tab. Each rule has a three-state select: Locked (superuser-only — the safe default for a new collection, stored as
null), Public (anyone — the explicit"@public"sentinel), or Expression (type a filter into the text input that appears). Forusers: set listRule, viewRule, and createRule to Public (@public— a publiccreateRuleis what makes signup open), and set updateRule and deleteRule to Expression with@request.auth.id = idin both (users may only edit or delete themselves). Save.simulators— type base, two fields:label(text, check req) andowner(relation, check req) — pickusersfrom the relation’s target dropdown. Note the convenience here: the UI picks relation targets by name and the server resolves the id for you; on the terminal path you have to capture and substitute collection ids yourself. Rules: set listRule and viewRule to Public (@public), set createRule to Expression@request.auth.id != "", and set updateRule and deleteRule to@request.auth.id = owner. Save.listings— type base, five fields:title(text, req),price_per_hour(number, req — pick fixed from the mode dropdown and enter2in the scale input that appears),status(select, req — typedraft,published,archivedinto the values input),simulator(relation, req — targetsimulators), andphotos(file — set maxSel to6).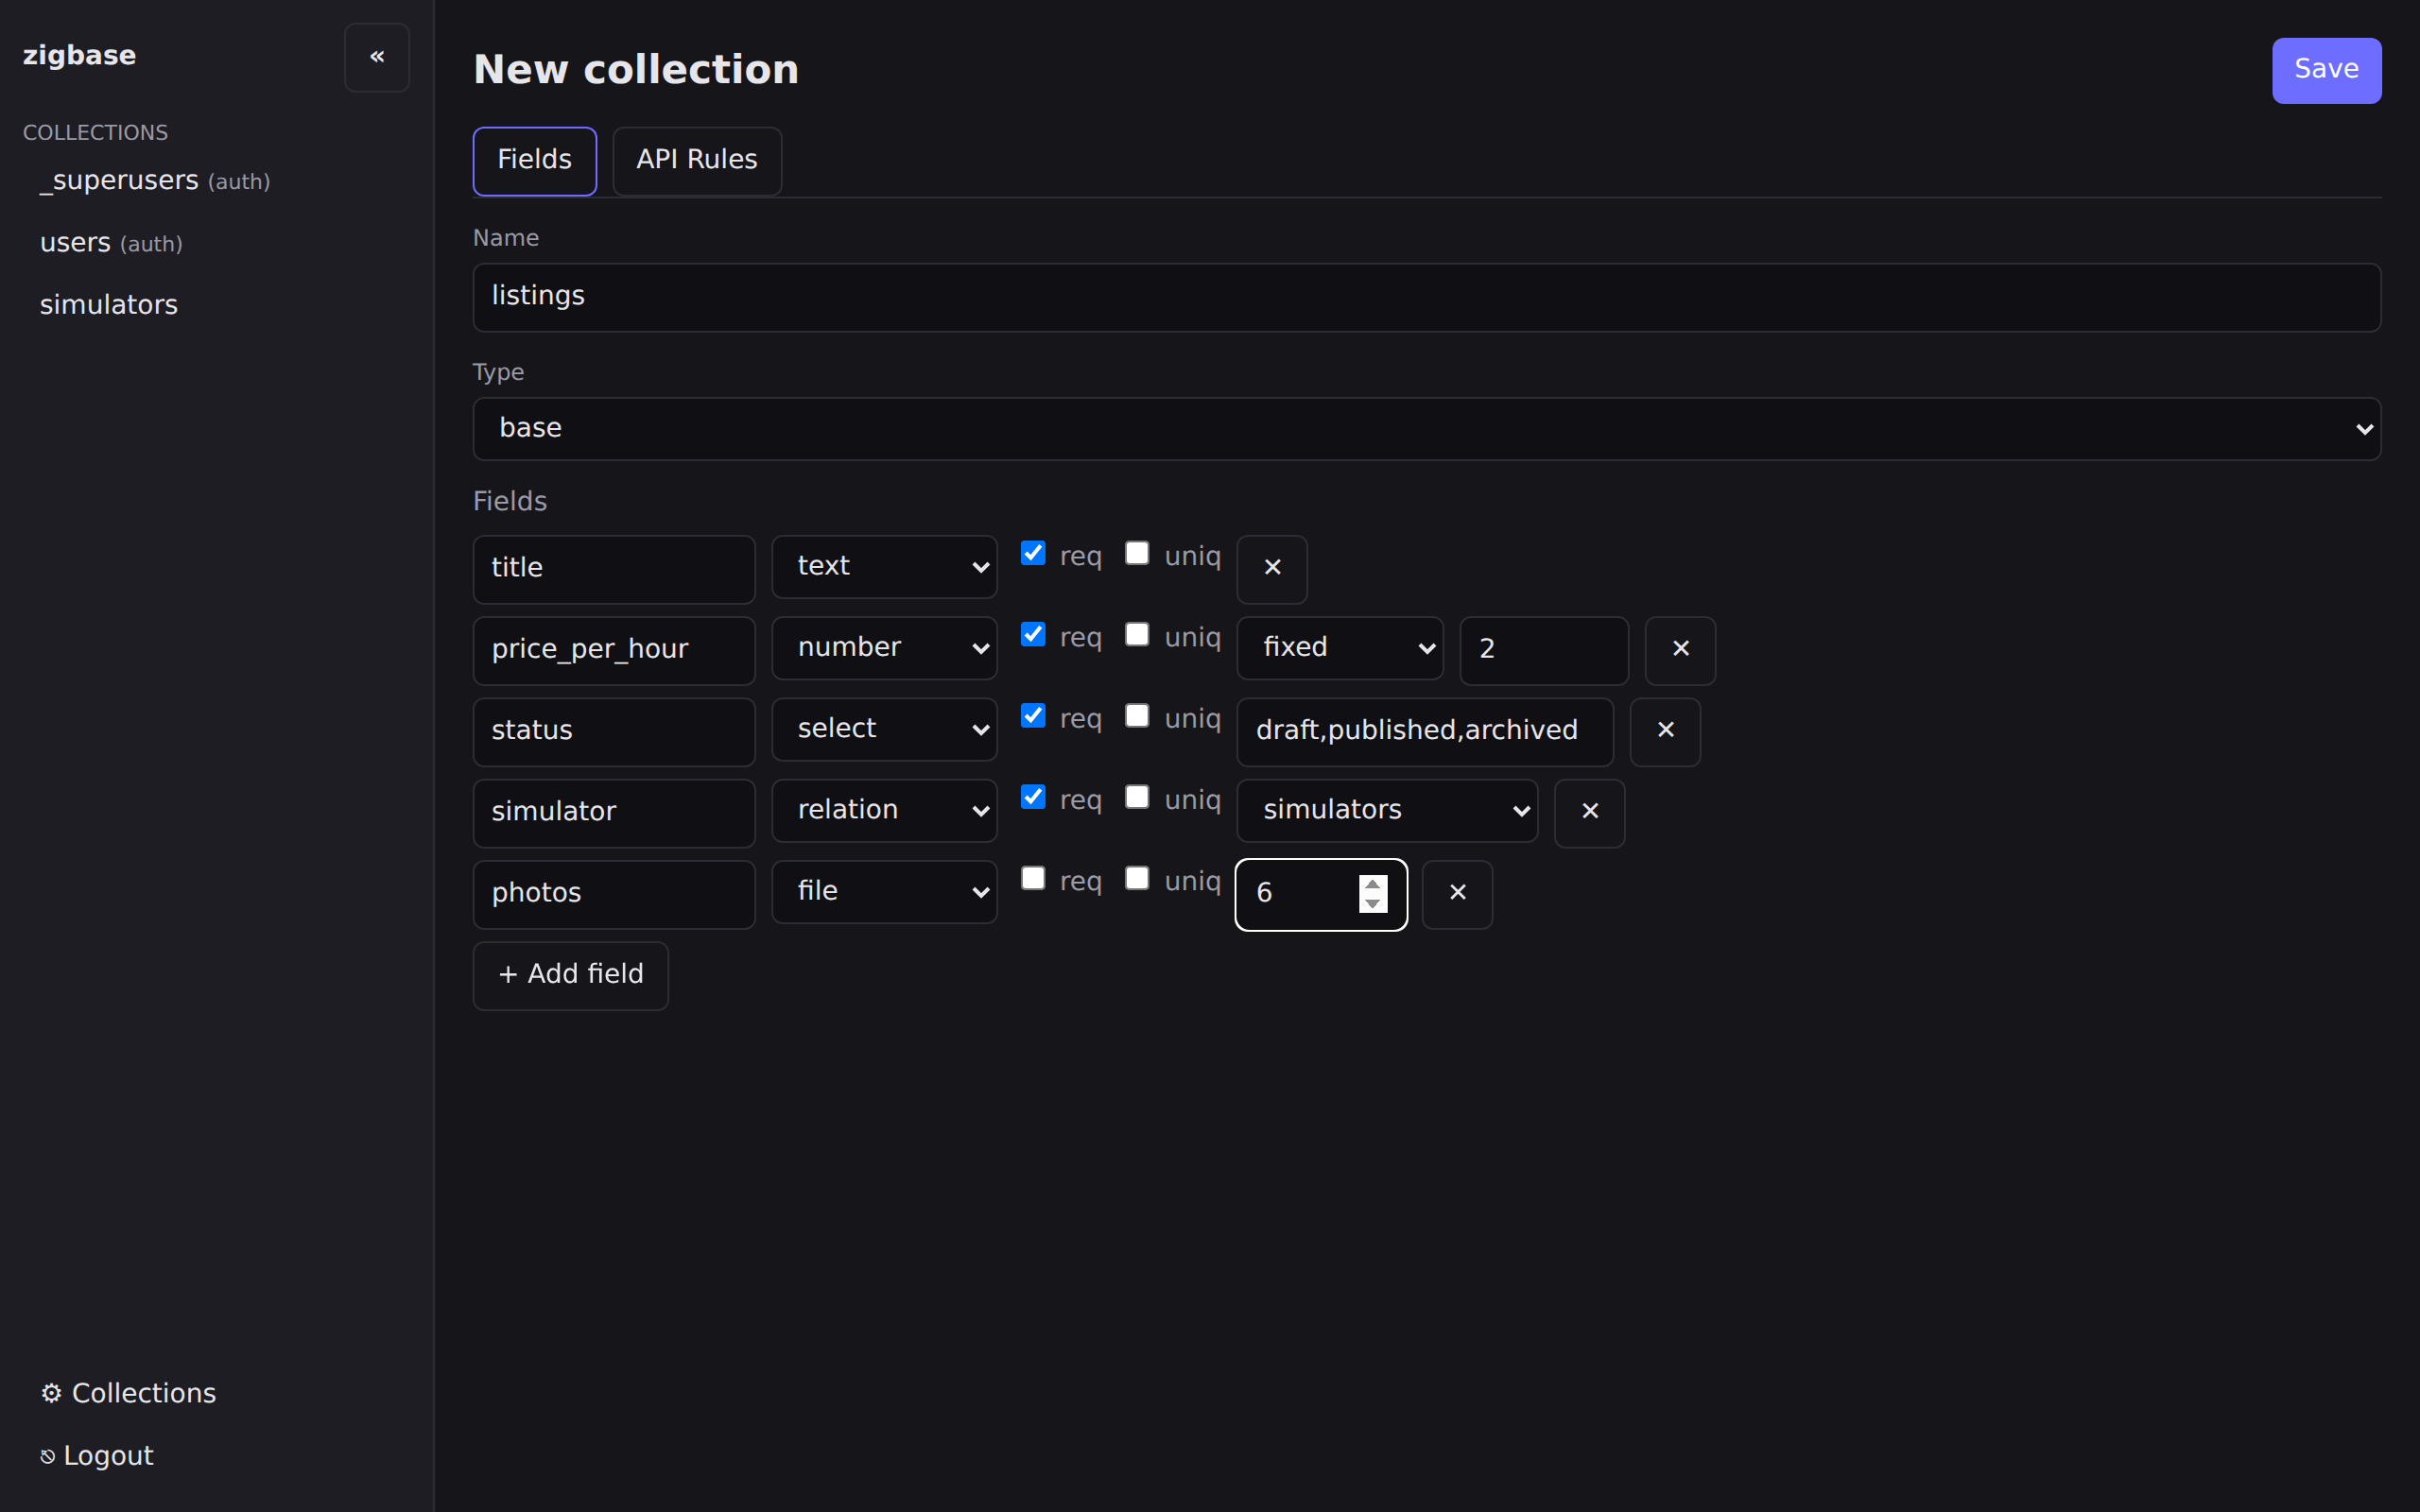
The schema editor with the five listings fields configured Rules: unlock all five; listRule
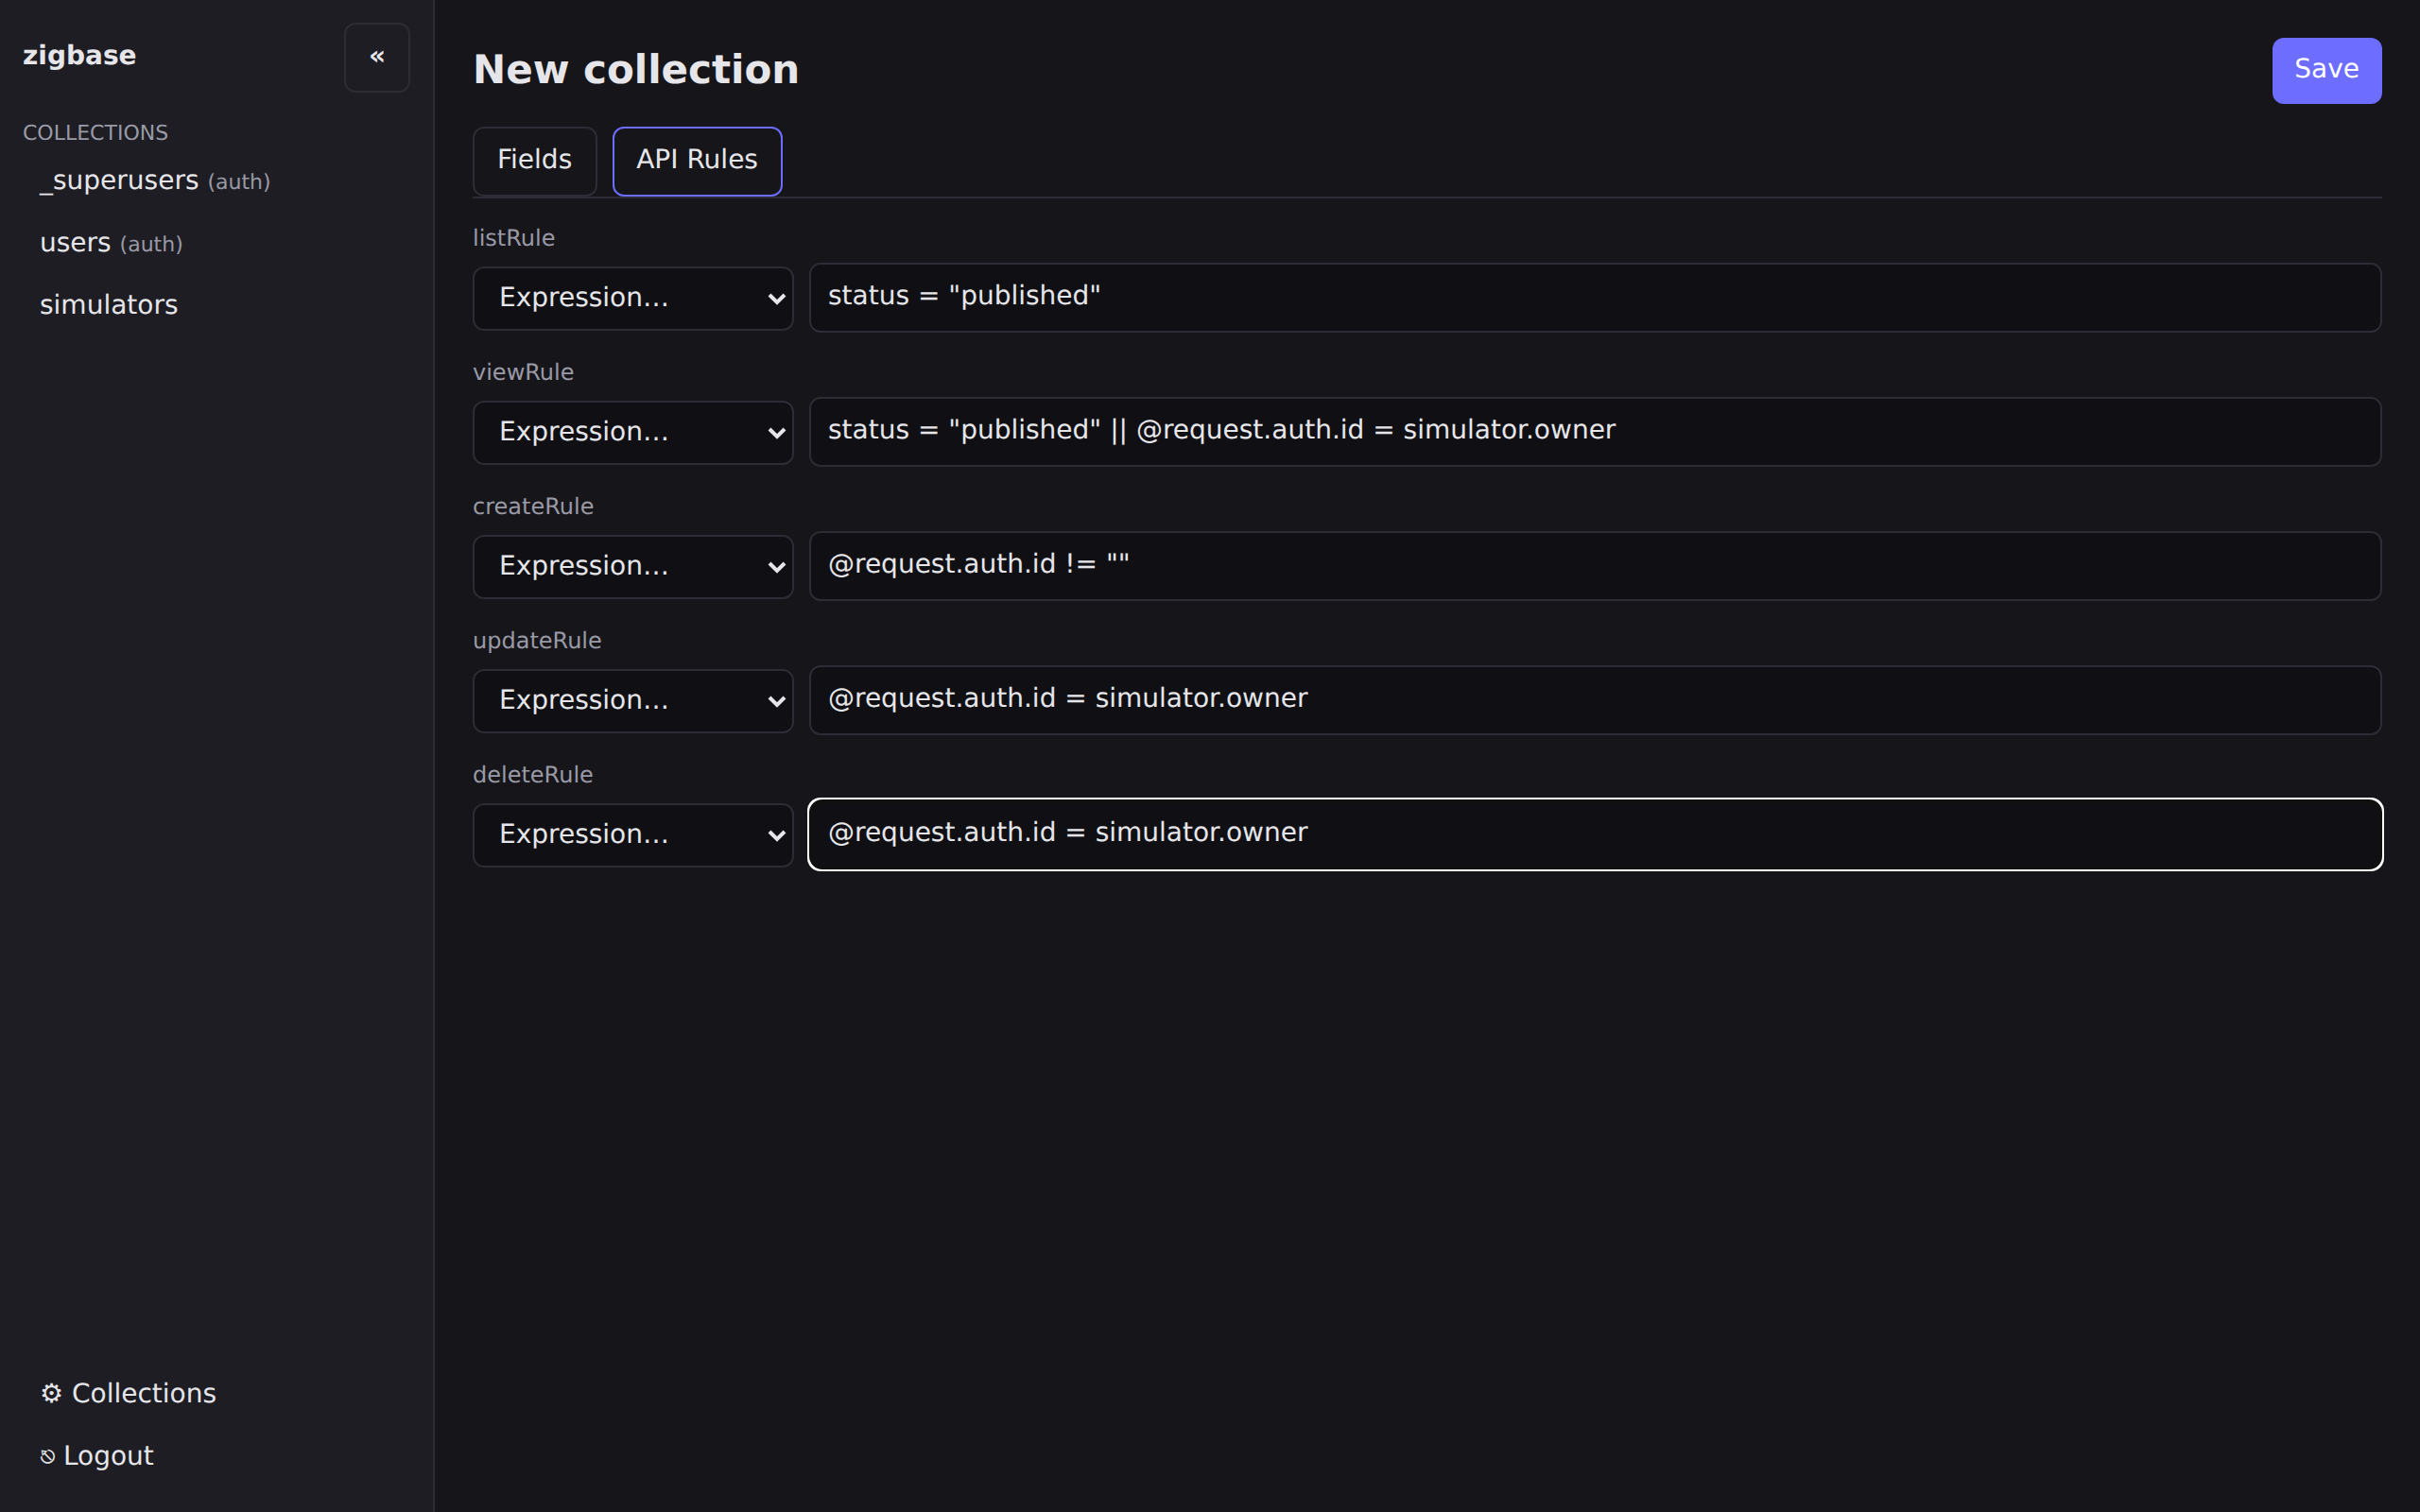
status = "published", viewRulestatus = "published" || @request.auth.id = simulator.owner, createRule@request.auth.id != "", and updateRule / deleteRule@request.auth.id = simulator.owner. Save.
What the UI can’t set (yet): advanced field options are API-only today —
cascadeDelete/minSelecton relations,min/max/patternon text,min/maxon number, andmaxSize/mimeTypeson file. The schema the UI saves is the same shape as the terminal path’s payloads, minus those constraints.
Terminal path
This path drives the REST collections API directly — the same calls the admin UI makes — by calling POST /api/collections as the superuser. (If you’d rather not hand-script the auth dance, zigbase schema apply schema.json applies a declarative schema document offline; see Migrating an existing backend to ZigBase. This tutorial walks the API so you see every moving part.) Relation fields point at their target by collection id (the id from the create response, not the name — see the relation gotcha), so you must create targets first and capture each returned id.
First, log in as the superuser. Superusers live in the built-in _superusers auth collection, so they use the normal auth endpoint:
TOKEN=
Create users (auth) and capture its id:
USERS_ID=
Then simulators (references users by id), then listings (references simulators). The full four-collection script — including bookings — is in Recipes → Provisioning your schema. Here is listings, which also carries a file field for photos:
SIMS_ID=
LISTINGS_ID=
The field shapes used here are catalogued in Fields.
Money fields:
price_per_houris a fixed-point number (scale: 2) — values are exact decimal strings like"45.00", stored as scaled integers, so there is no float drift; inputs and responses both carry the string form. Themin: 0in the terminal path still keeps prices non-negative (validation_minon violation). See Fields → number.
2. Understand the access rules you just set
Each collection’s five rules (listRule/viewRule/createRule/updateRule/ deleteRule) are filter expressions. Safe-by-default: a blank rule (null or "") means superuser-only (Locked); the explicit sentinel "@public" means public (anyone — and ZigBase logs a startup warning for each one); anything else is checked per request. Highlights from above:
users:createRule: "@public"→ open signup (anyone may create a user). Update/delete are self-only (@request.auth.id = id).simulators/listings: writes are owner-scoped (@request.auth.id = simulator.owner), which uses relation traversal — following the single-valuesimulatorrelation to read the owner.listingsare publicly listable only whenstatus = "published"; the owner can also view their drafts.
Admin UI path
This is the API Rules tab of listings as you left it — each rule’s select chooses Locked (superuser-only, stored as null), Public ("@public" — anyone), or Expression, and an Expression is evaluated per request:
Terminal path
On the terminal path there is nothing left to do here: the rules were the listRule … deleteRule keys you already sent in step 1’s POST /api/collections payloads, and they took effect the moment each collection was created.
Rule grammar and denial status codes are in API → Access rules; owner-scoped and relation-traversal patterns (and how the owner field gets set safely) are in Recipes → Owner-scoped access rules.
3. Register a user and log in
Signup is a record create on the users auth collection (there is no separate register endpoint). The server hashes the password, strips the plaintext, sets verified=false, and mints a token key.
Admin UI path
Signup is deliberately an end-user action, even on the admin-UI path: the admin record drawer has no password field, because users register themselves through your app (or, here, through two curls):
curl -s -X POST "$BASE/api/collections/users/records" \
  -H 'Content-Type: application/json' \
  -d '{"email":"host@example.com","password":"hostpassword","name":"Demo Host"}'
password must be at least minPasswordLength (default 8). Log in to get the token and id the terminal path uses for step 4 (the admin-UI path won’t need them):
LOGIN=
HOST_TOKEN=
HOST_ID=
Now click users in the admin sidebar — the new record is there:
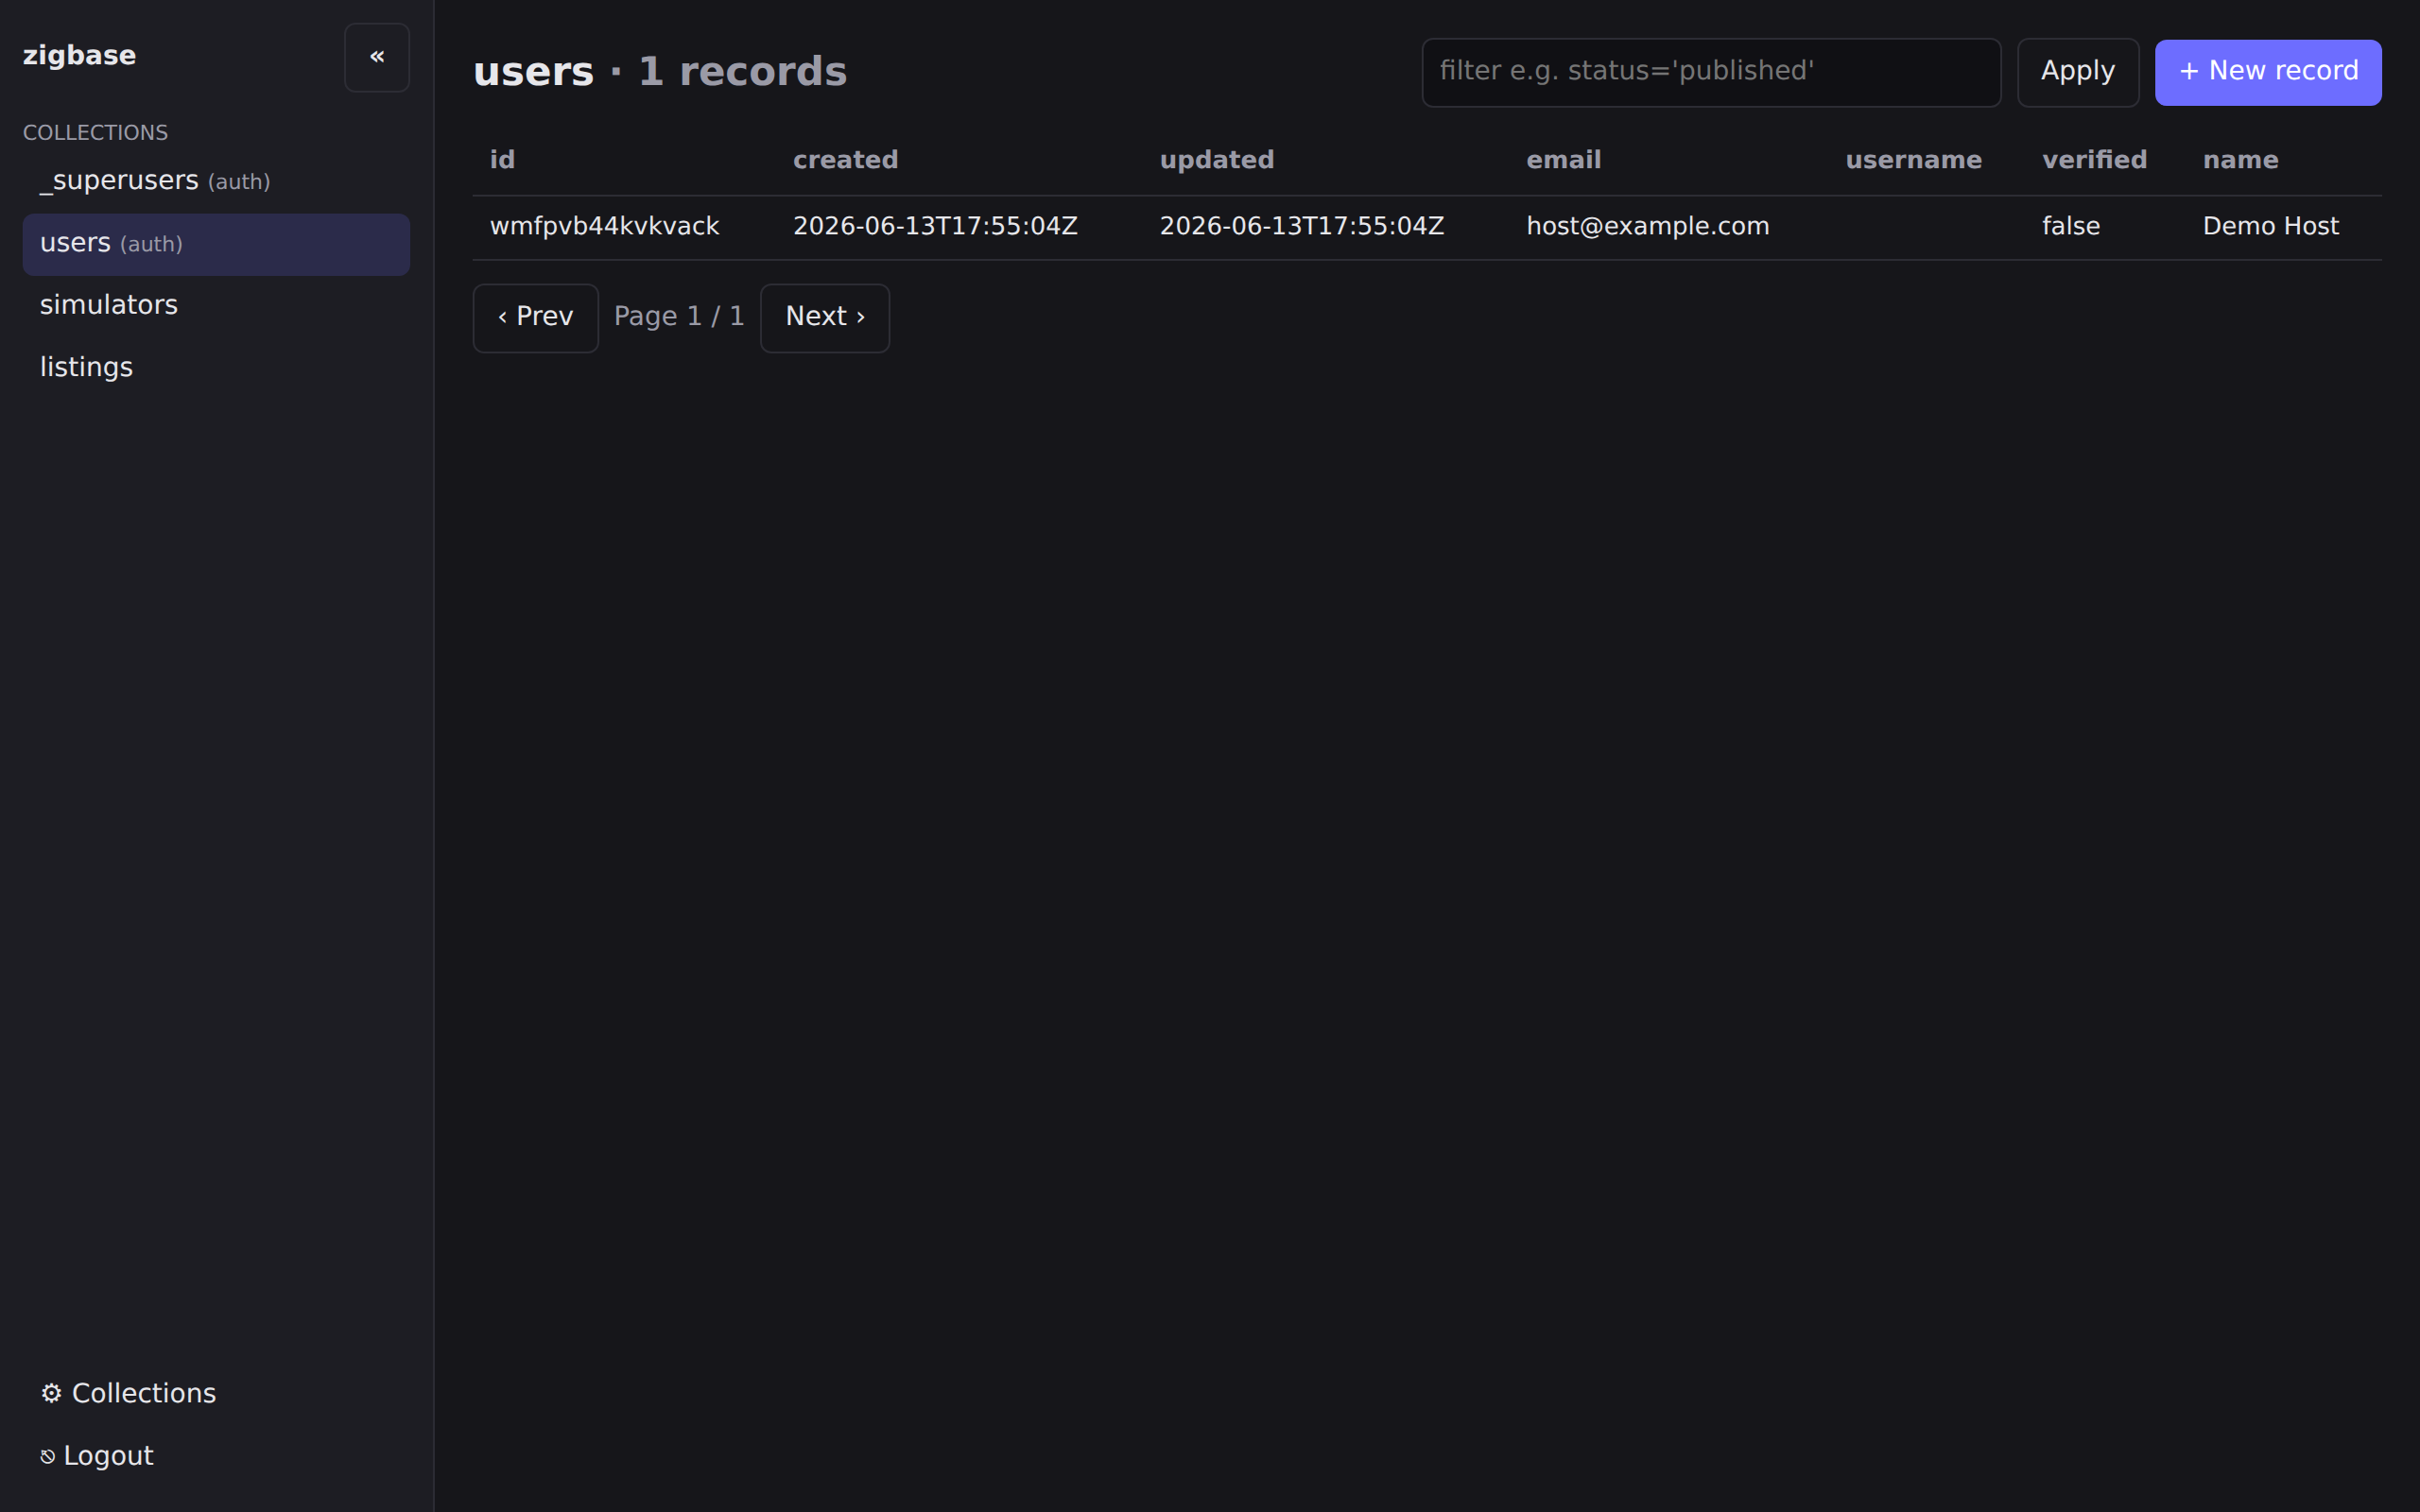
And if you already had the table open when the curl ran, the row appeared without a refresh: the records table is a live realtime subscriber over WebSocket, so you’re literally watching the realtime API at work. Click the row to open the record drawer — you can edit the user from here (for example, tick verified).
Terminal path
curl -s -X POST "$BASE/api/collections/users/records" \
  -H 'Content-Type: application/json' \
  -d '{"email":"host@example.com","password":"hostpassword","name":"Demo Host"}'
password must be at least minPasswordLength (default 8). Now log in to get a token and the user’s id:
LOGIN=
HOST_TOKEN=
HOST_ID=
Details: Recipes → User registration and API → Auth.
4. Create records, including a file upload
Time for data: a simulator the host owns, then a listing with a photo.
Admin UI path
Click simulators in the sidebar, then + New record. The drawer renders one control per field: type Bay 1 — TrackMan into label, and pick the host’s record from the owner relation dropdown (it lists users records by id). Save.
Then open listings → + New record: title Sunset Tee Times, price_per_hour 45.00, status published from the select dropdown, the simulator you just created from the simulator relation dropdown, and choose a photo (say, bay1.jpg) in the photos file input — it accepts multiple files since maxSelect is 6.
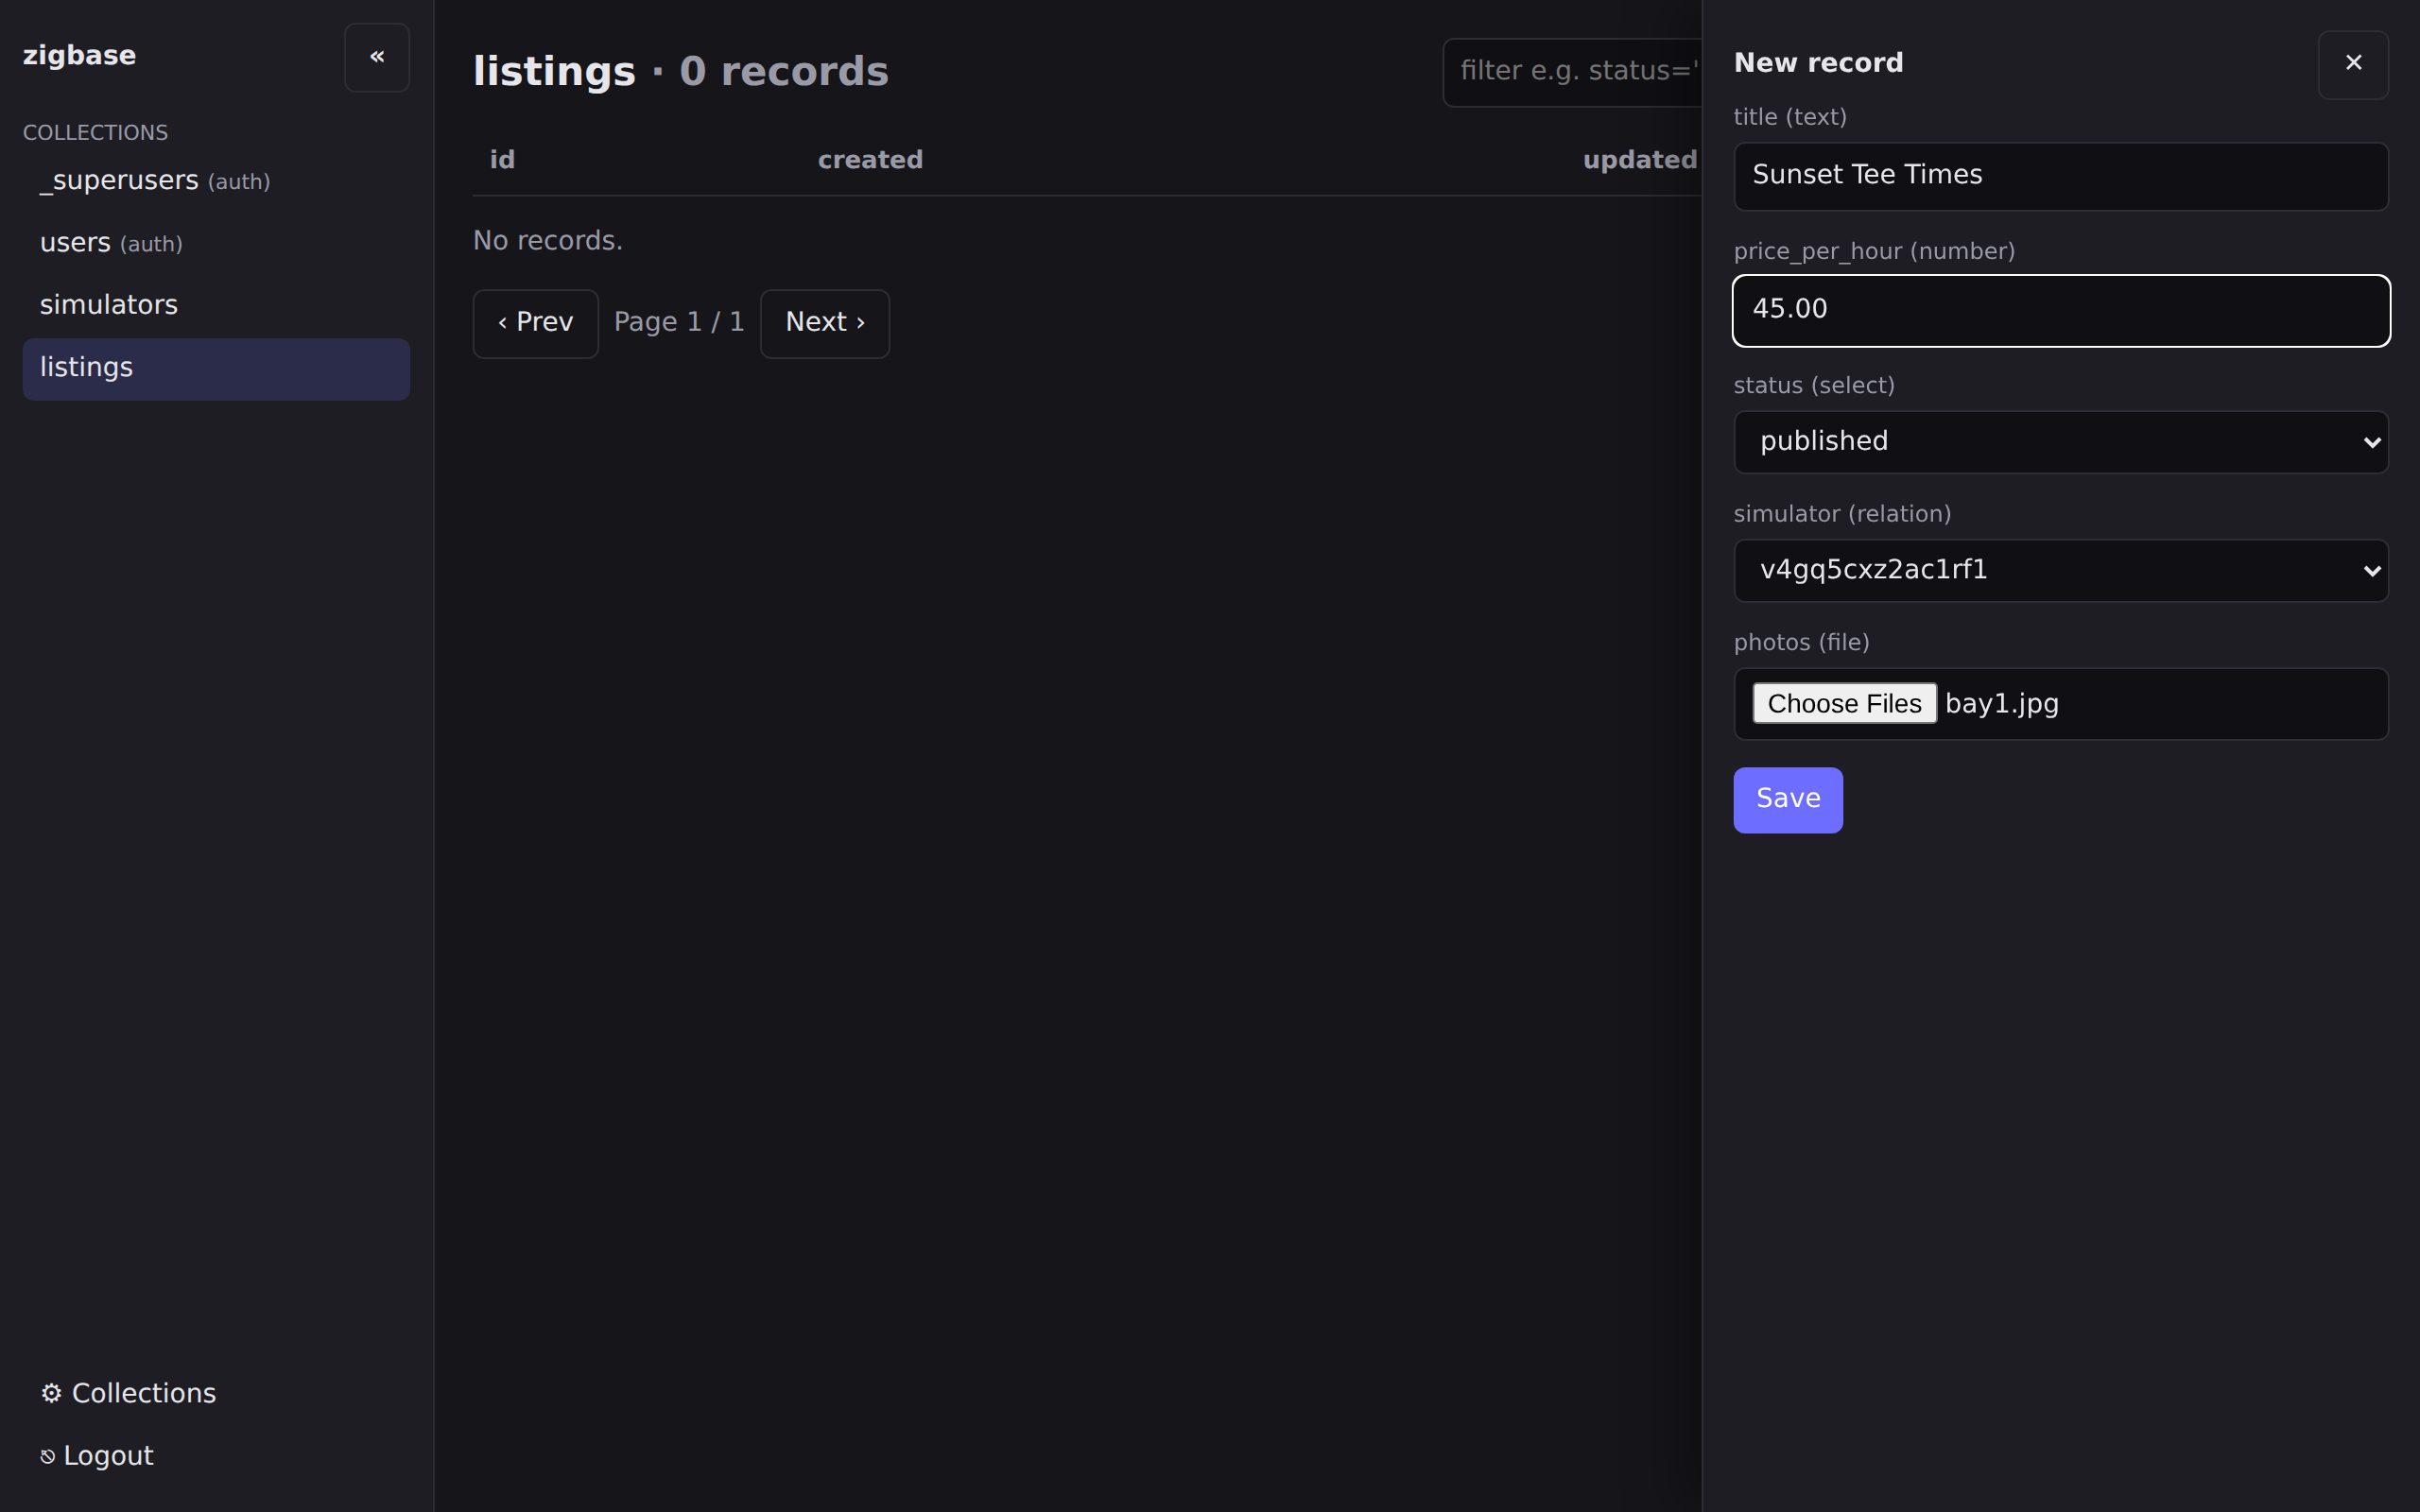
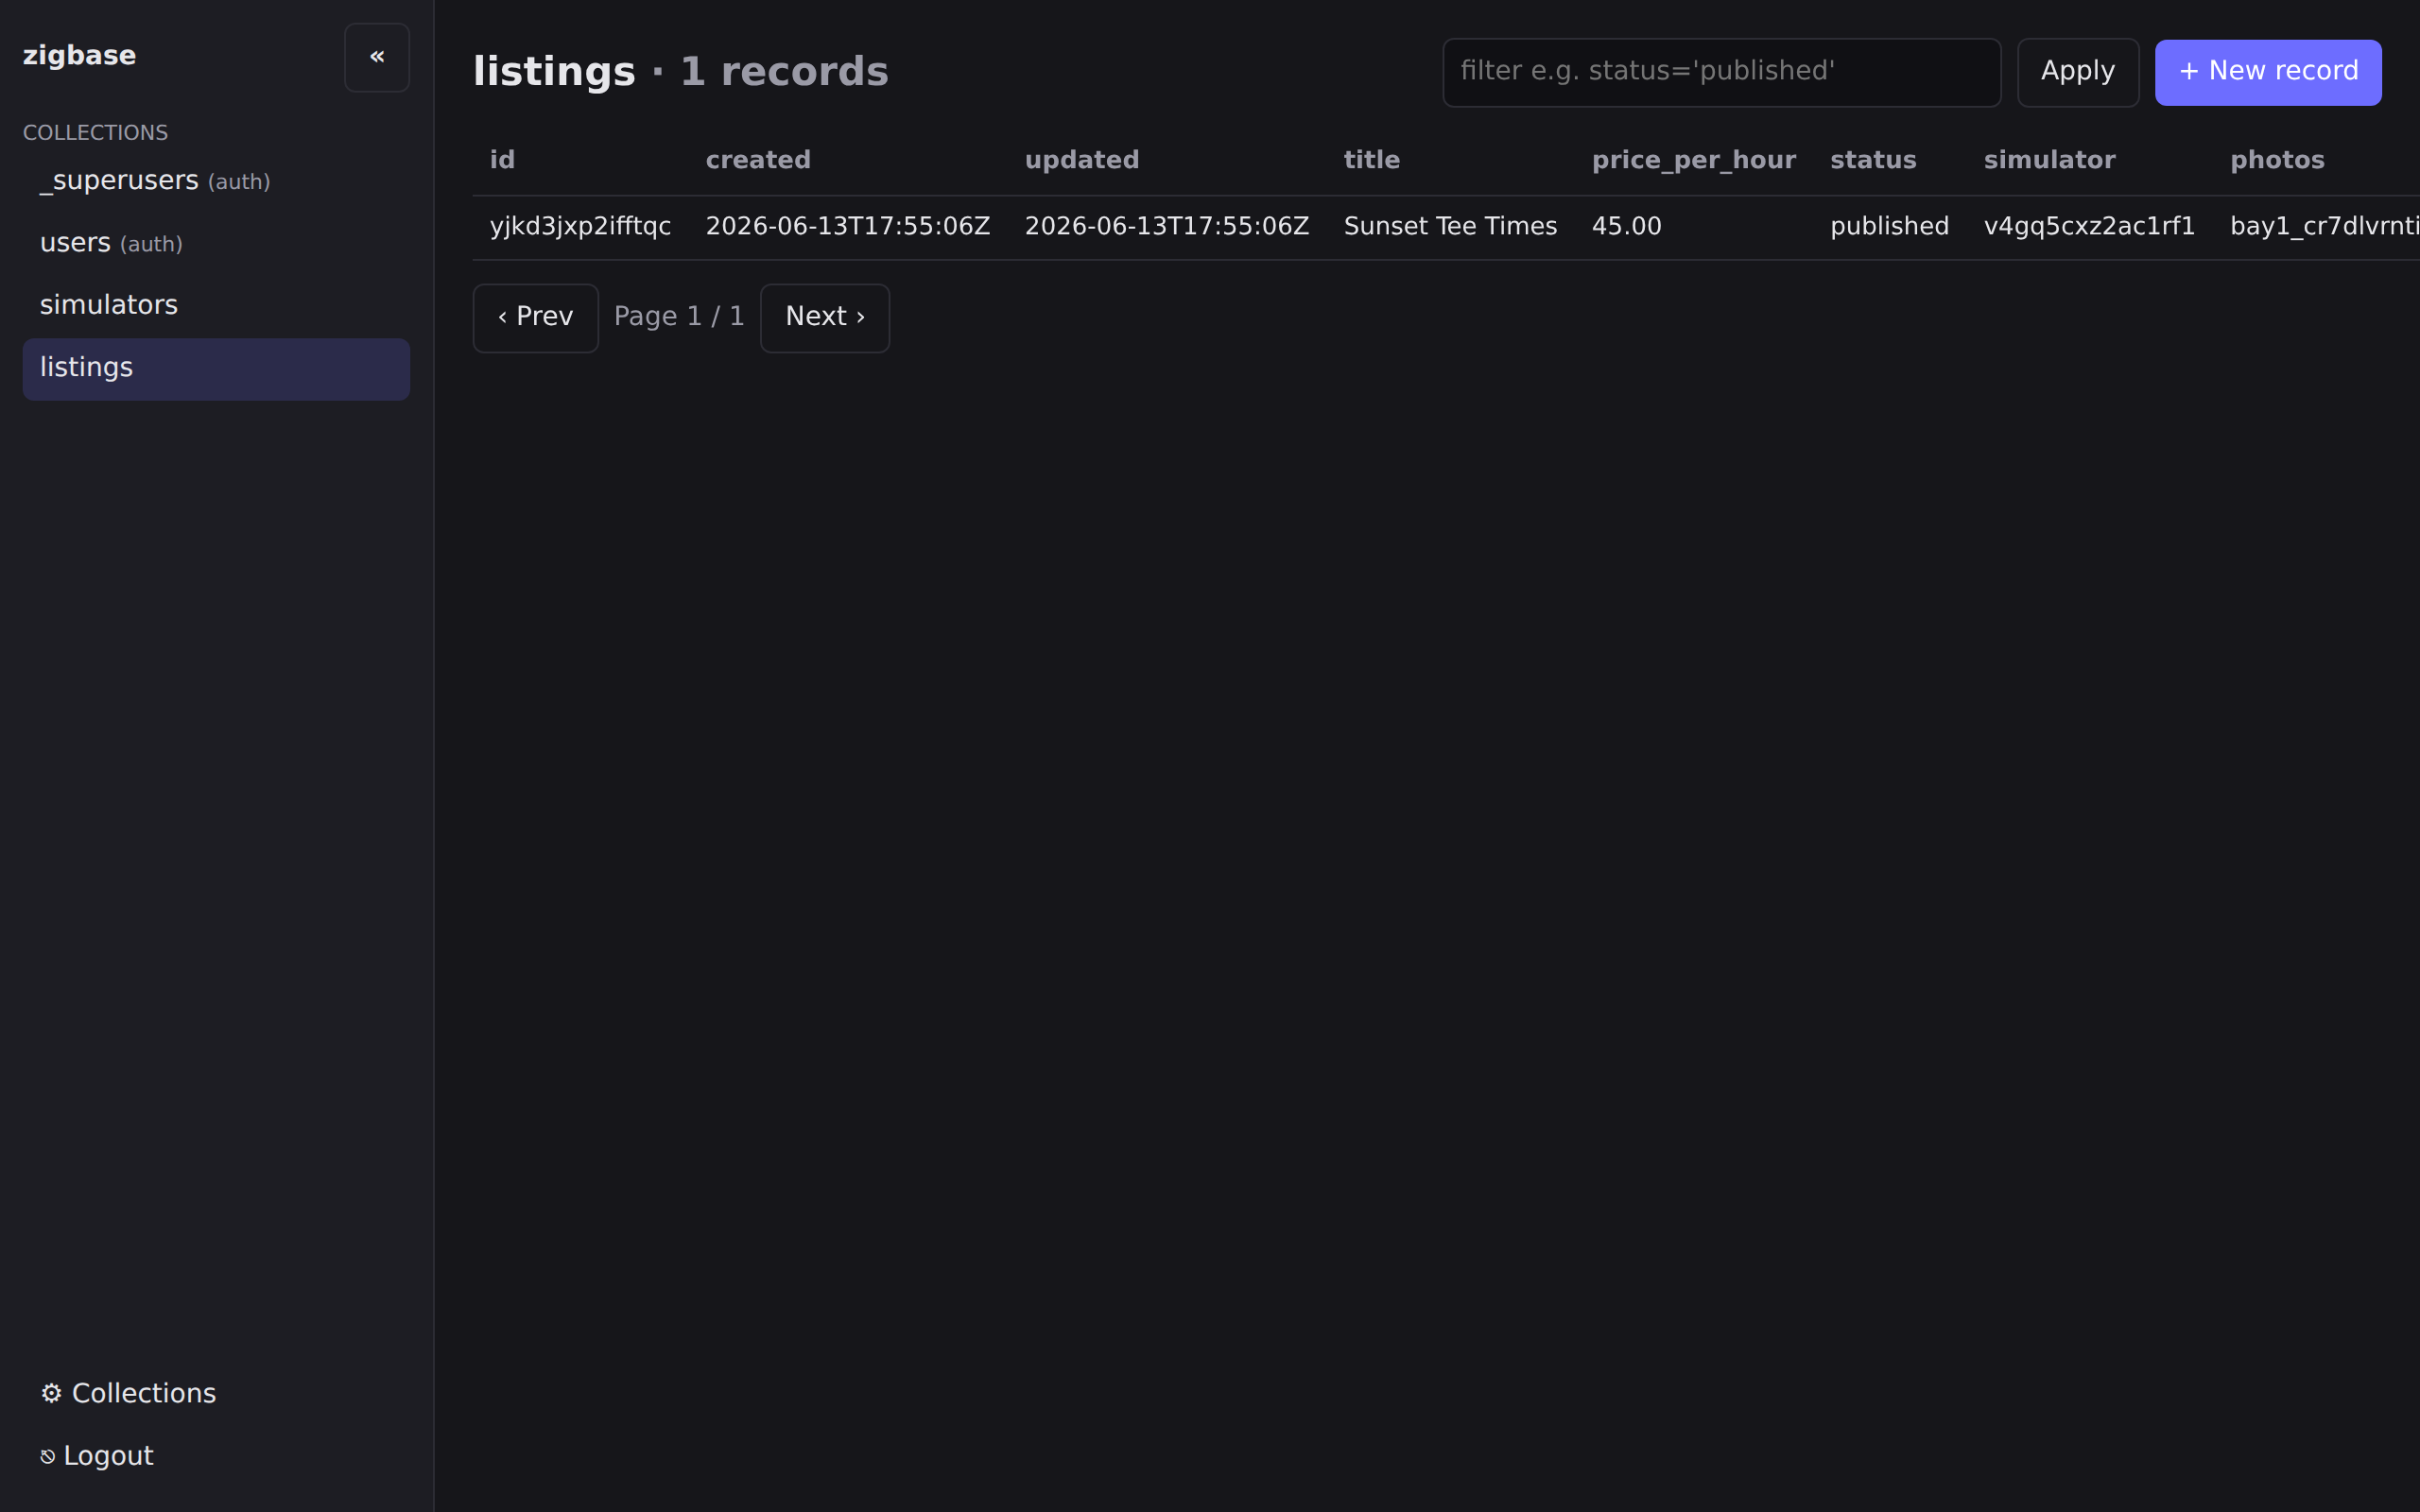
Save. The drawer sends plain JSON normally, and switches to a multipart/form-data upload automatically when files are chosen — the same two request shapes the terminal path makes by hand. The listings table now shows the record — the fixed-point price renders as the exact 45.00 you typed, uploaded filename included (and on edit, existing files get “(remove)” checkboxes):
Terminal path
Create a simulator the host owns:
SIM_ID=
Now create a listing with a photo upload. A file field is populated via multipart/form-data: send the non-file fields as form fields and the file under the field’s name (photos). With curl, use -F:
curl -s -X POST "$BASE/api/collections/listings/records" \
  -H "Authorization: Bearer $HOST_TOKEN" \
  -F "title=Sunset Tee Times" \
  -F "price_per_hour=45.00" \
  -F "status=published" \
  -F "simulator=$SIM_ID" \
  -F "photos=@./bay1.jpg;type=image/jpeg"
The 201 response echoes the record, with price_per_hour round-tripping as the exact string "45.00" (fixed-point) and photos holding the stored, randomized filename. A negative price (-F "price_per_hour=-1") is rejected with a 400 validation_min.
The uploaded file is stored locally and served from GET /api/files/listings/:recordId/:filename. Because listings has a public viewRule for published rows, the photo serves directly; protected collections need a bearer token, the auth cookie, or a short-lived file token. See API → Files.
5. Configure OAuth2 sign-in (optional)
Password signup works, but “Sign in with Google” is a form away: open the users collection in the schema editor and switch to its Auth / OAuth2 tab. It holds the auth-collection knobs (identityFields, minPasswordLength) plus an OAuth2 enabled checkbox and a + Add provider picker (google, github, microsoft, discord, or generic). Add a provider, paste the client id and the write-only client secret from the provider’s console, and list the redirect URL(s) your app uses — what would otherwise be an afternoon of OAuth plumbing is a form:
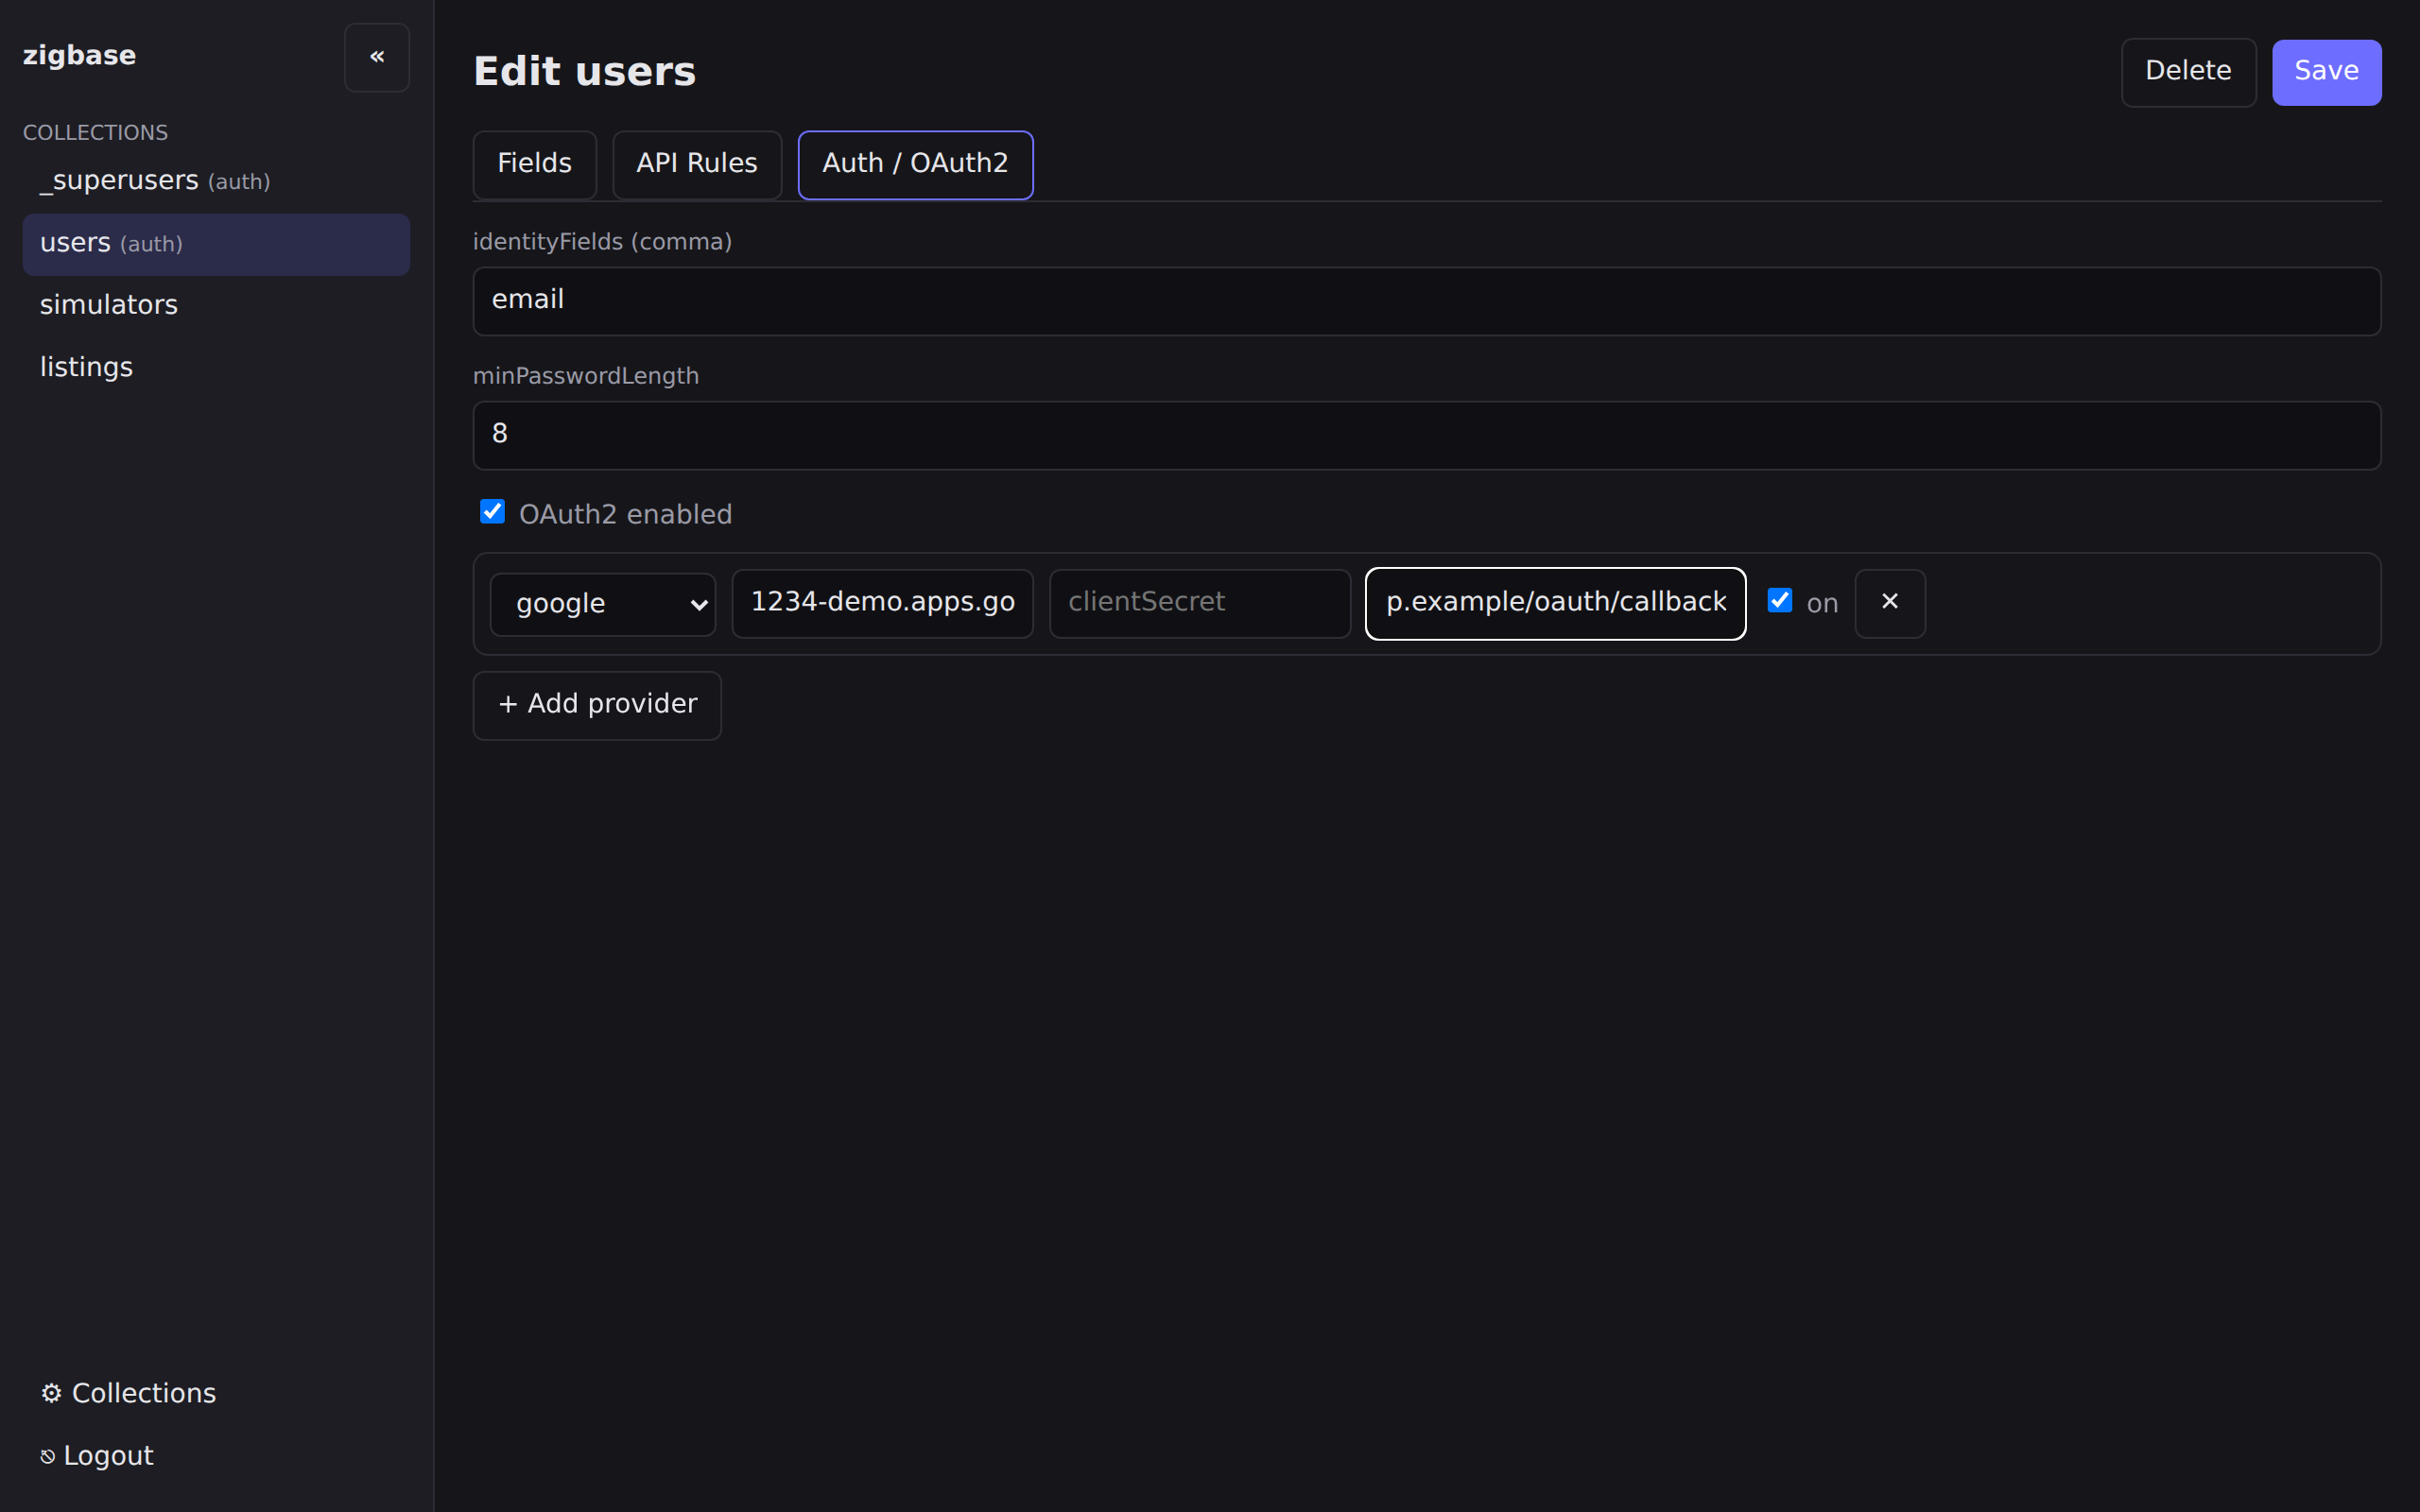
Your frontend then lists enabled providers and exchanges the authorization code via two endpoints — see API → OAuth2 for the flow.
6. Add a custom business route (the Zig framework)
REST CRUD covers most needs, but “confirm a booking” is business logic. ZigBase is an embeddable Zig framework: import it, register a custom route, and your binary is the server. A POST /api/bookings/:id/confirm handler reads the :id path param, loads the record, and flips its status:
const std = @import("std");
const zigbase = @import("zigbase");

fn confirmBooking(ctx: *zigbase.Ctx) anyerror!zigbase.http.Response {
    const a = ctx.arena.a; // the request arena's allocator
    const id = ctx.request.?.param("id") orelse
        return ctx.jsonError(404, "not_found", "Not found.");

    var patch: std.json.ObjectMap = .empty;
    try patch.put(a, "status", .{ .string = "confirmed" });
    const updated = (try ctx.records().update("bookings", id, .{ .object = patch })) orelse
        return ctx.jsonError(404, "not_found", "Not found.");

    return .{ .status = 200, .body = try std.json.Stringify.valueAlloc(a, updated, .{}) };
}
ctx (*zigbase.Ctx) is the per-request capability object: the raw request via ctx.request.? (path params with ctx.request.?.param), the authenticated identity via ctx.user(), and DB access via ctx.records() — which checks out and releases a pooled connection for you, so there is no manual acquireWriter / Data wiring. The full version (with owner authorization) is in Recipes → a custom business route.
7. Add a scheduled job
A nightly job cancels stale pending bookings. A JobEvent still carries app and name, but the scheduler now hands the job a *zigbase.Ctx first — so, like the route above, you read and write through ctx.records() (which manages the pooled connection for you, no manual wiring):
fn expireStaleBookings(ctx: *zigbase.Ctx, ev: *zigbase.events.JobEvent) anyerror!void {
    const a = ev.app.allocator;
    const stale = try ctx.records().list("bookings", .{ .filter = "status = \"pending\"", .perPage = 200 });
    for (stale.items) |item| {
        const bid = item.object.get("id").?.string;
        var patch: std.json.ObjectMap = .empty;
        try patch.put(a, "status", .{ .string = "cancelled" });
        _ = try ctx.records().update("bookings", bid, .{ .object = patch });
    }
}
8. Wire it all into your App(.{...})
The hook, route, and job come together in one comptime config. This is the whole extended server:
const std = @import("std");
const zigbase = @import("zigbase");

// ... confirmBooking, expireStaleBookings, validateBooking defined above ...

pub fn main(init: std.process.Init) !void {
    return zigbase.App(.{
        .hooks = .{
            .bookings = .{ .beforeCreate = validateBooking }, // overlap check + computed field
        },
        .routes = .{
            .{ .method = .POST, .path = "/api/bookings/:id/confirm", .handler = confirmBooking, .auth = .authed },
        },
        .pools = .{ .jobs = 2 },
        .cron = .{
            .{ .name = "expire-bookings",
               .schedule = zigbase.schedule.Schedule{ .cron = "0 3 * * *" },
               .handler = expireStaleBookings },
        },
    }).runCli(init);
}
runCli gives your binary the same serve / migrate / superuser create / help commands as the stock server. A misconfigured extension (unknown config key, typo’d hook phase, wrong-typed handler) is a compile error, so it never reaches runtime.
Build and run your binary exactly as in step 0 (it replaces zig-out/bin/zigbase). The validateBooking before-hook is shown in full in Recipes → computed-field / validation hook.
Where to go next
- Field reference: every type and option → Fields
- More recipes: provisioning, owner rules, hooks, routes, jobs → Recipes
- API reference: records query (
filter/sort/expand), realtime, files → API - Framework reference: the full hook/route/job/event surface → Framework
- Caveats: Known limitations
The finished app
This exact backend — same collections, same rules, plus the booking hook, route, and cron job — ships as a runnable example with a web frontend baked into the binary:
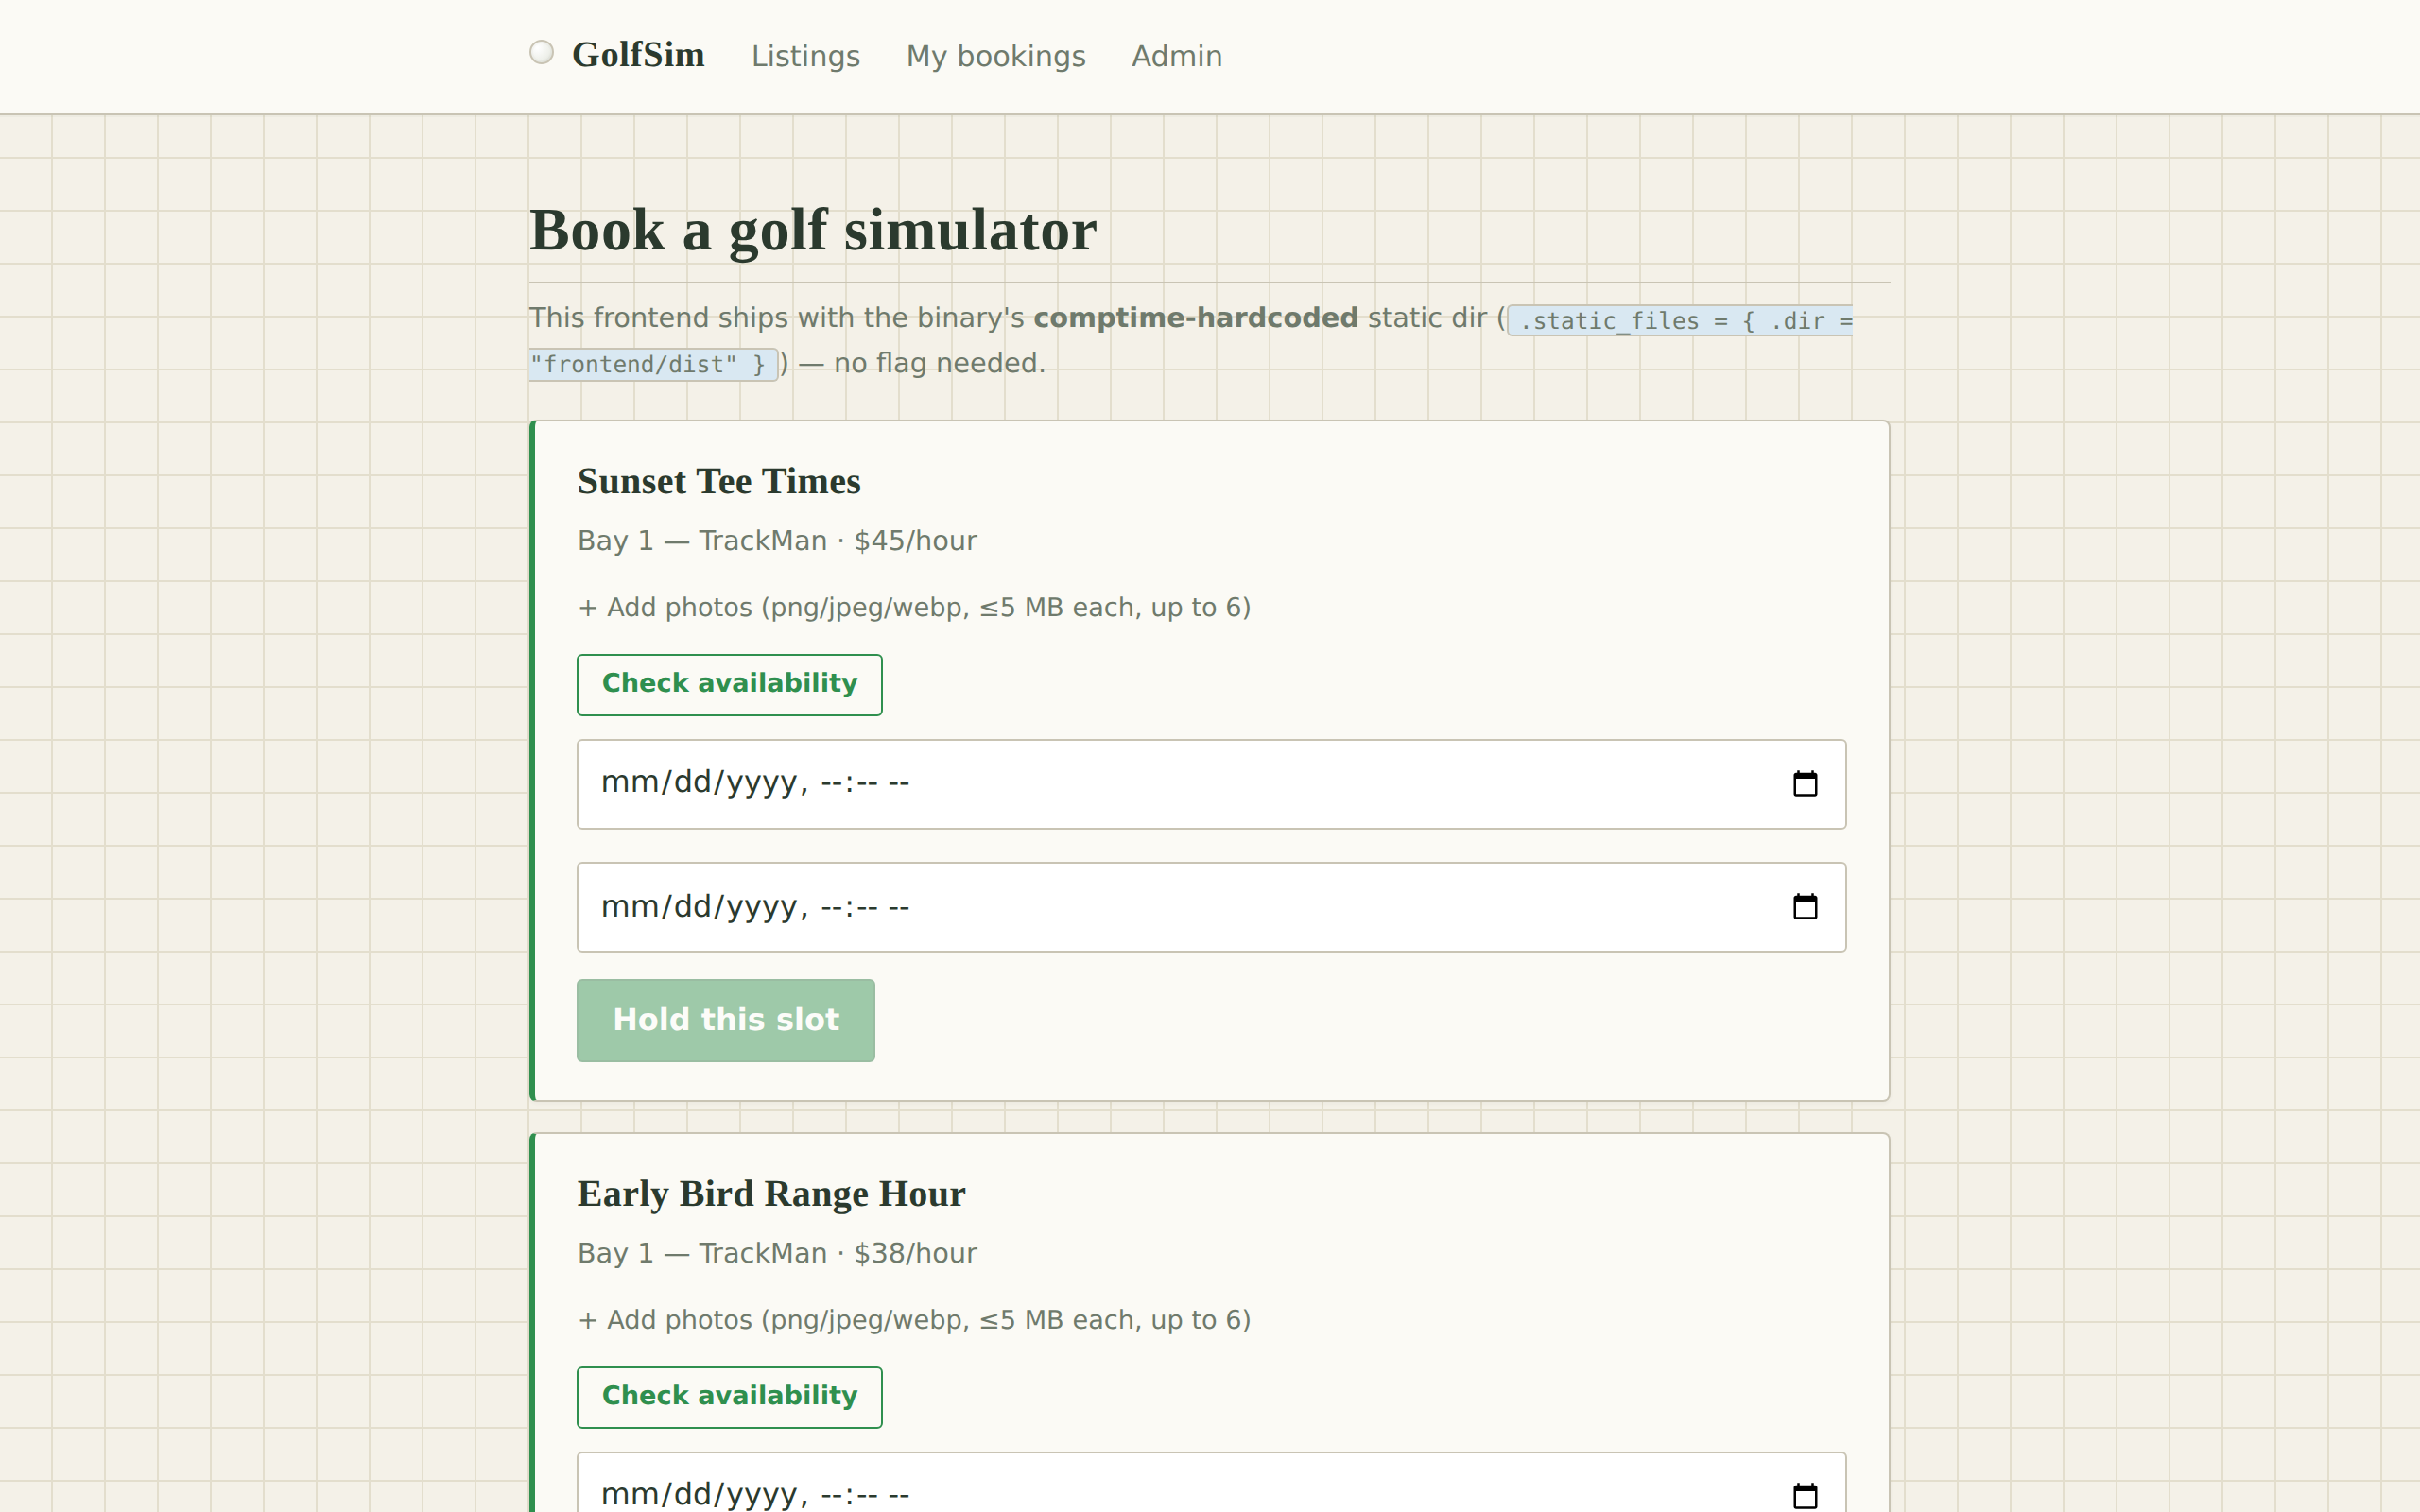
Browse the walkthrough at Examples → Golf simulator booking, or see the other rungs of the ladder (a minimal blog, a plugin marketplace) on the Examples index.